HP Proliant DL580 G2
Article, webpage, photos by: Máté Mihalik
Brief
The HP
Proliant DL580 G2 is a high performance enterprise class 4U rack server. It was
exceptional in its era,
because it was the first server in its class to allow
hot plug memory operation on failed DIMMs, reducing overall downtime.
Based on
the NetBurst microarchitecture, it entered service in the golden age of x86
(32-bit) CPUs. The server
was widely used between 2003-2008 in large scale
demanding applications, until newer generation servers took over with
their
massive advantage of 64-bit and virtualization capabilities.
Architecture
The DL580 G2 is a
quad-CPU system using the conventional north bridge/south bridge architecture.
The four CPUs share the same 400Mhz front-side bus which connects them to the
ServerWorks Grand Champion HE chipset (north bridge).
It has 4x1 interleaved DDR 200Mhz memory (PC1600 Registered ECC), up to 32GB
supported.
The chipset is theoretically able to handle 64GB of RAM, but the server was
designed to have 16 DIMM slots in full configuration,
each accepting 2GB modules
at maximum.
Six PCI-X (64-bit, 100Mhz, 3.3v) slots provide I/O connectivity, from which 4
are hot-pluggable.
The six slots share the bandwidth of three PCI-X buses (2 slots/bus).
HP information on DL580 G2
These files were
acquired from HP's website, all credits and copyrights and stuff like that
are HP's. I just uploaded them here for reference.
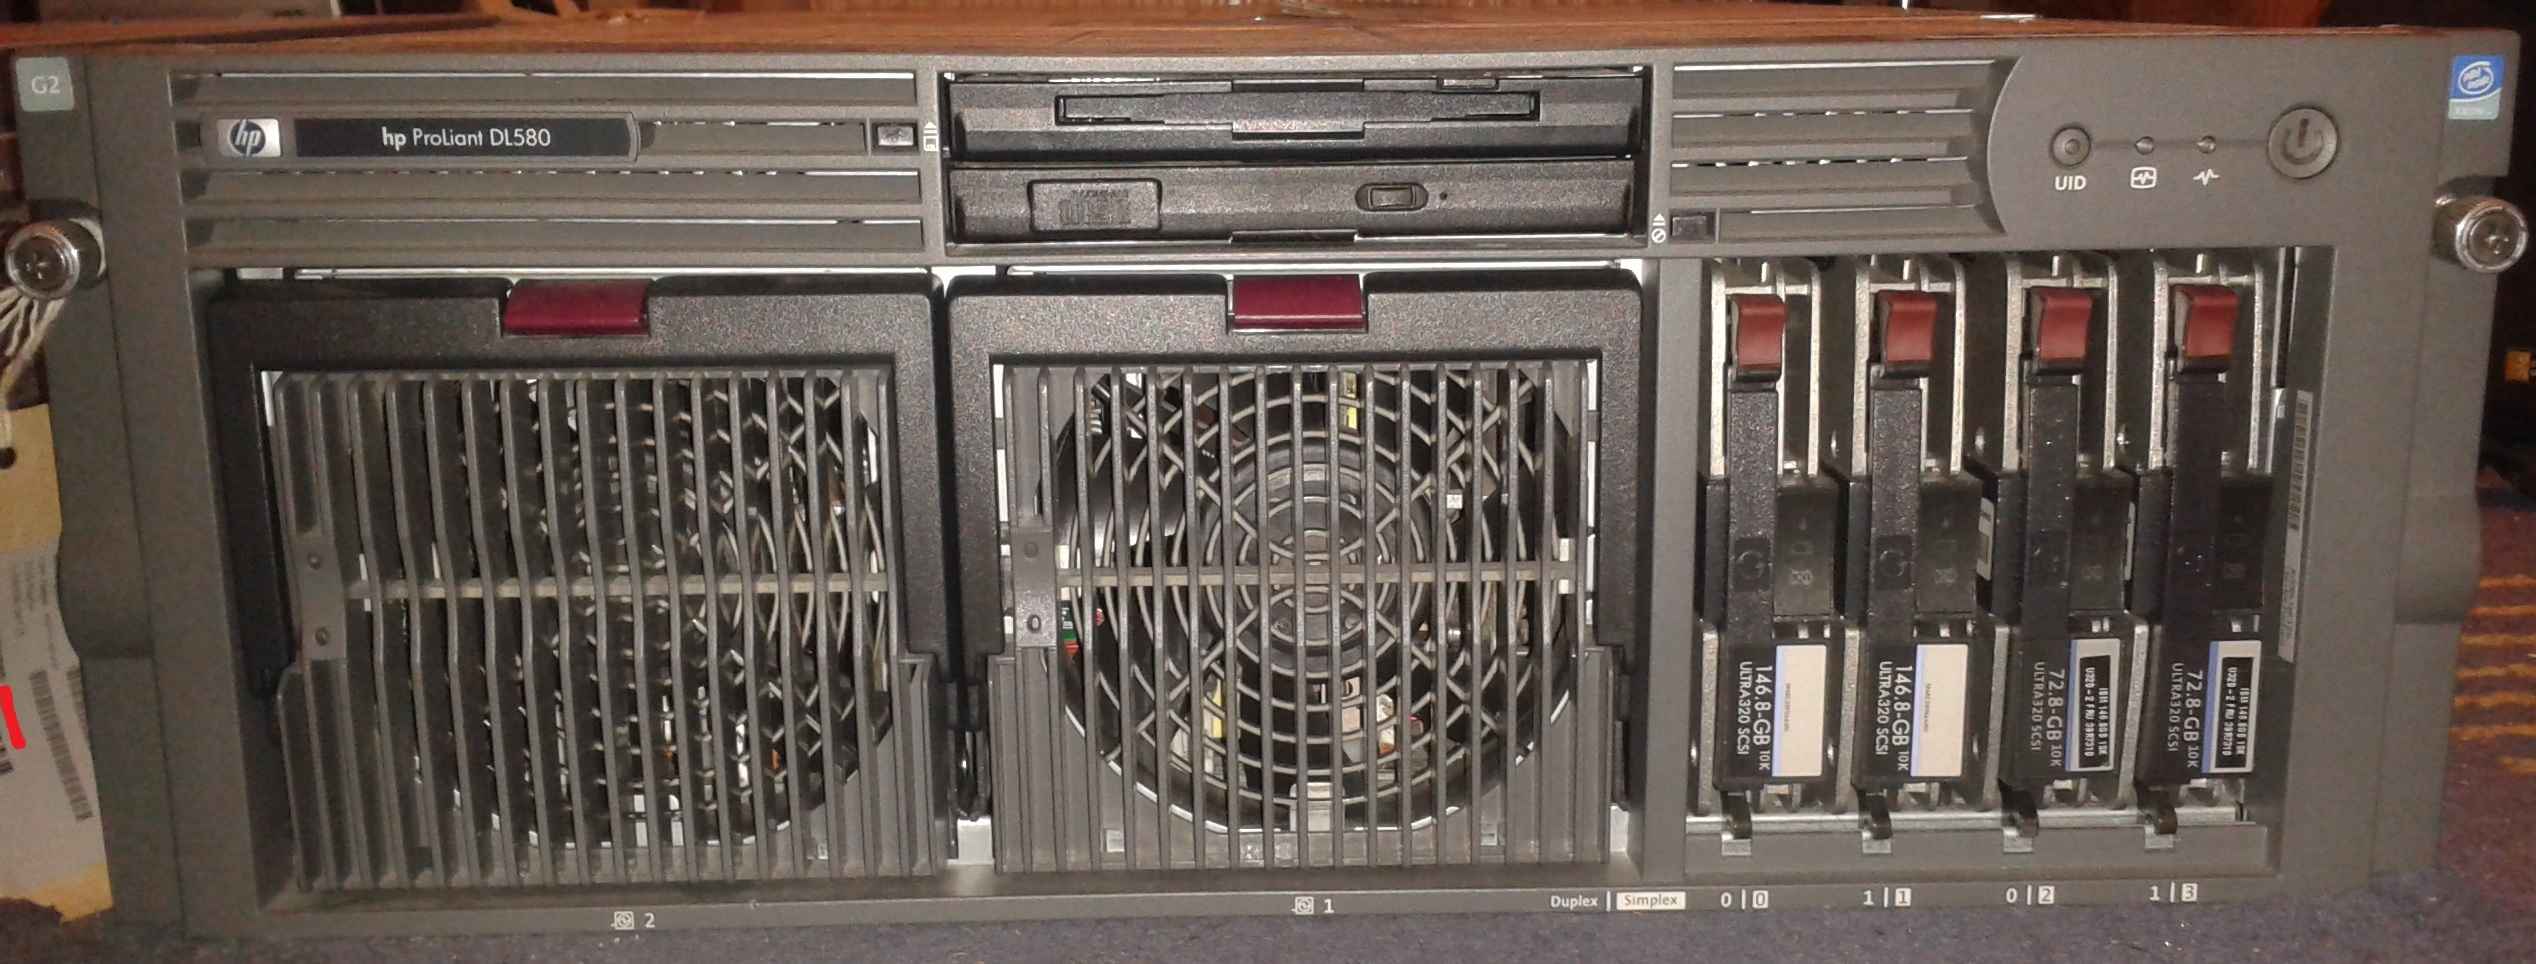
Tour around my HP Proliant DL580 G2 server
When viewed from the front, the DL580 G2
gives the impression of a robust server.
The design isn't much of an eyecandy, but not bad looking either. Every
component has its function so nothing occupies space on the front panel
unnecessarily.
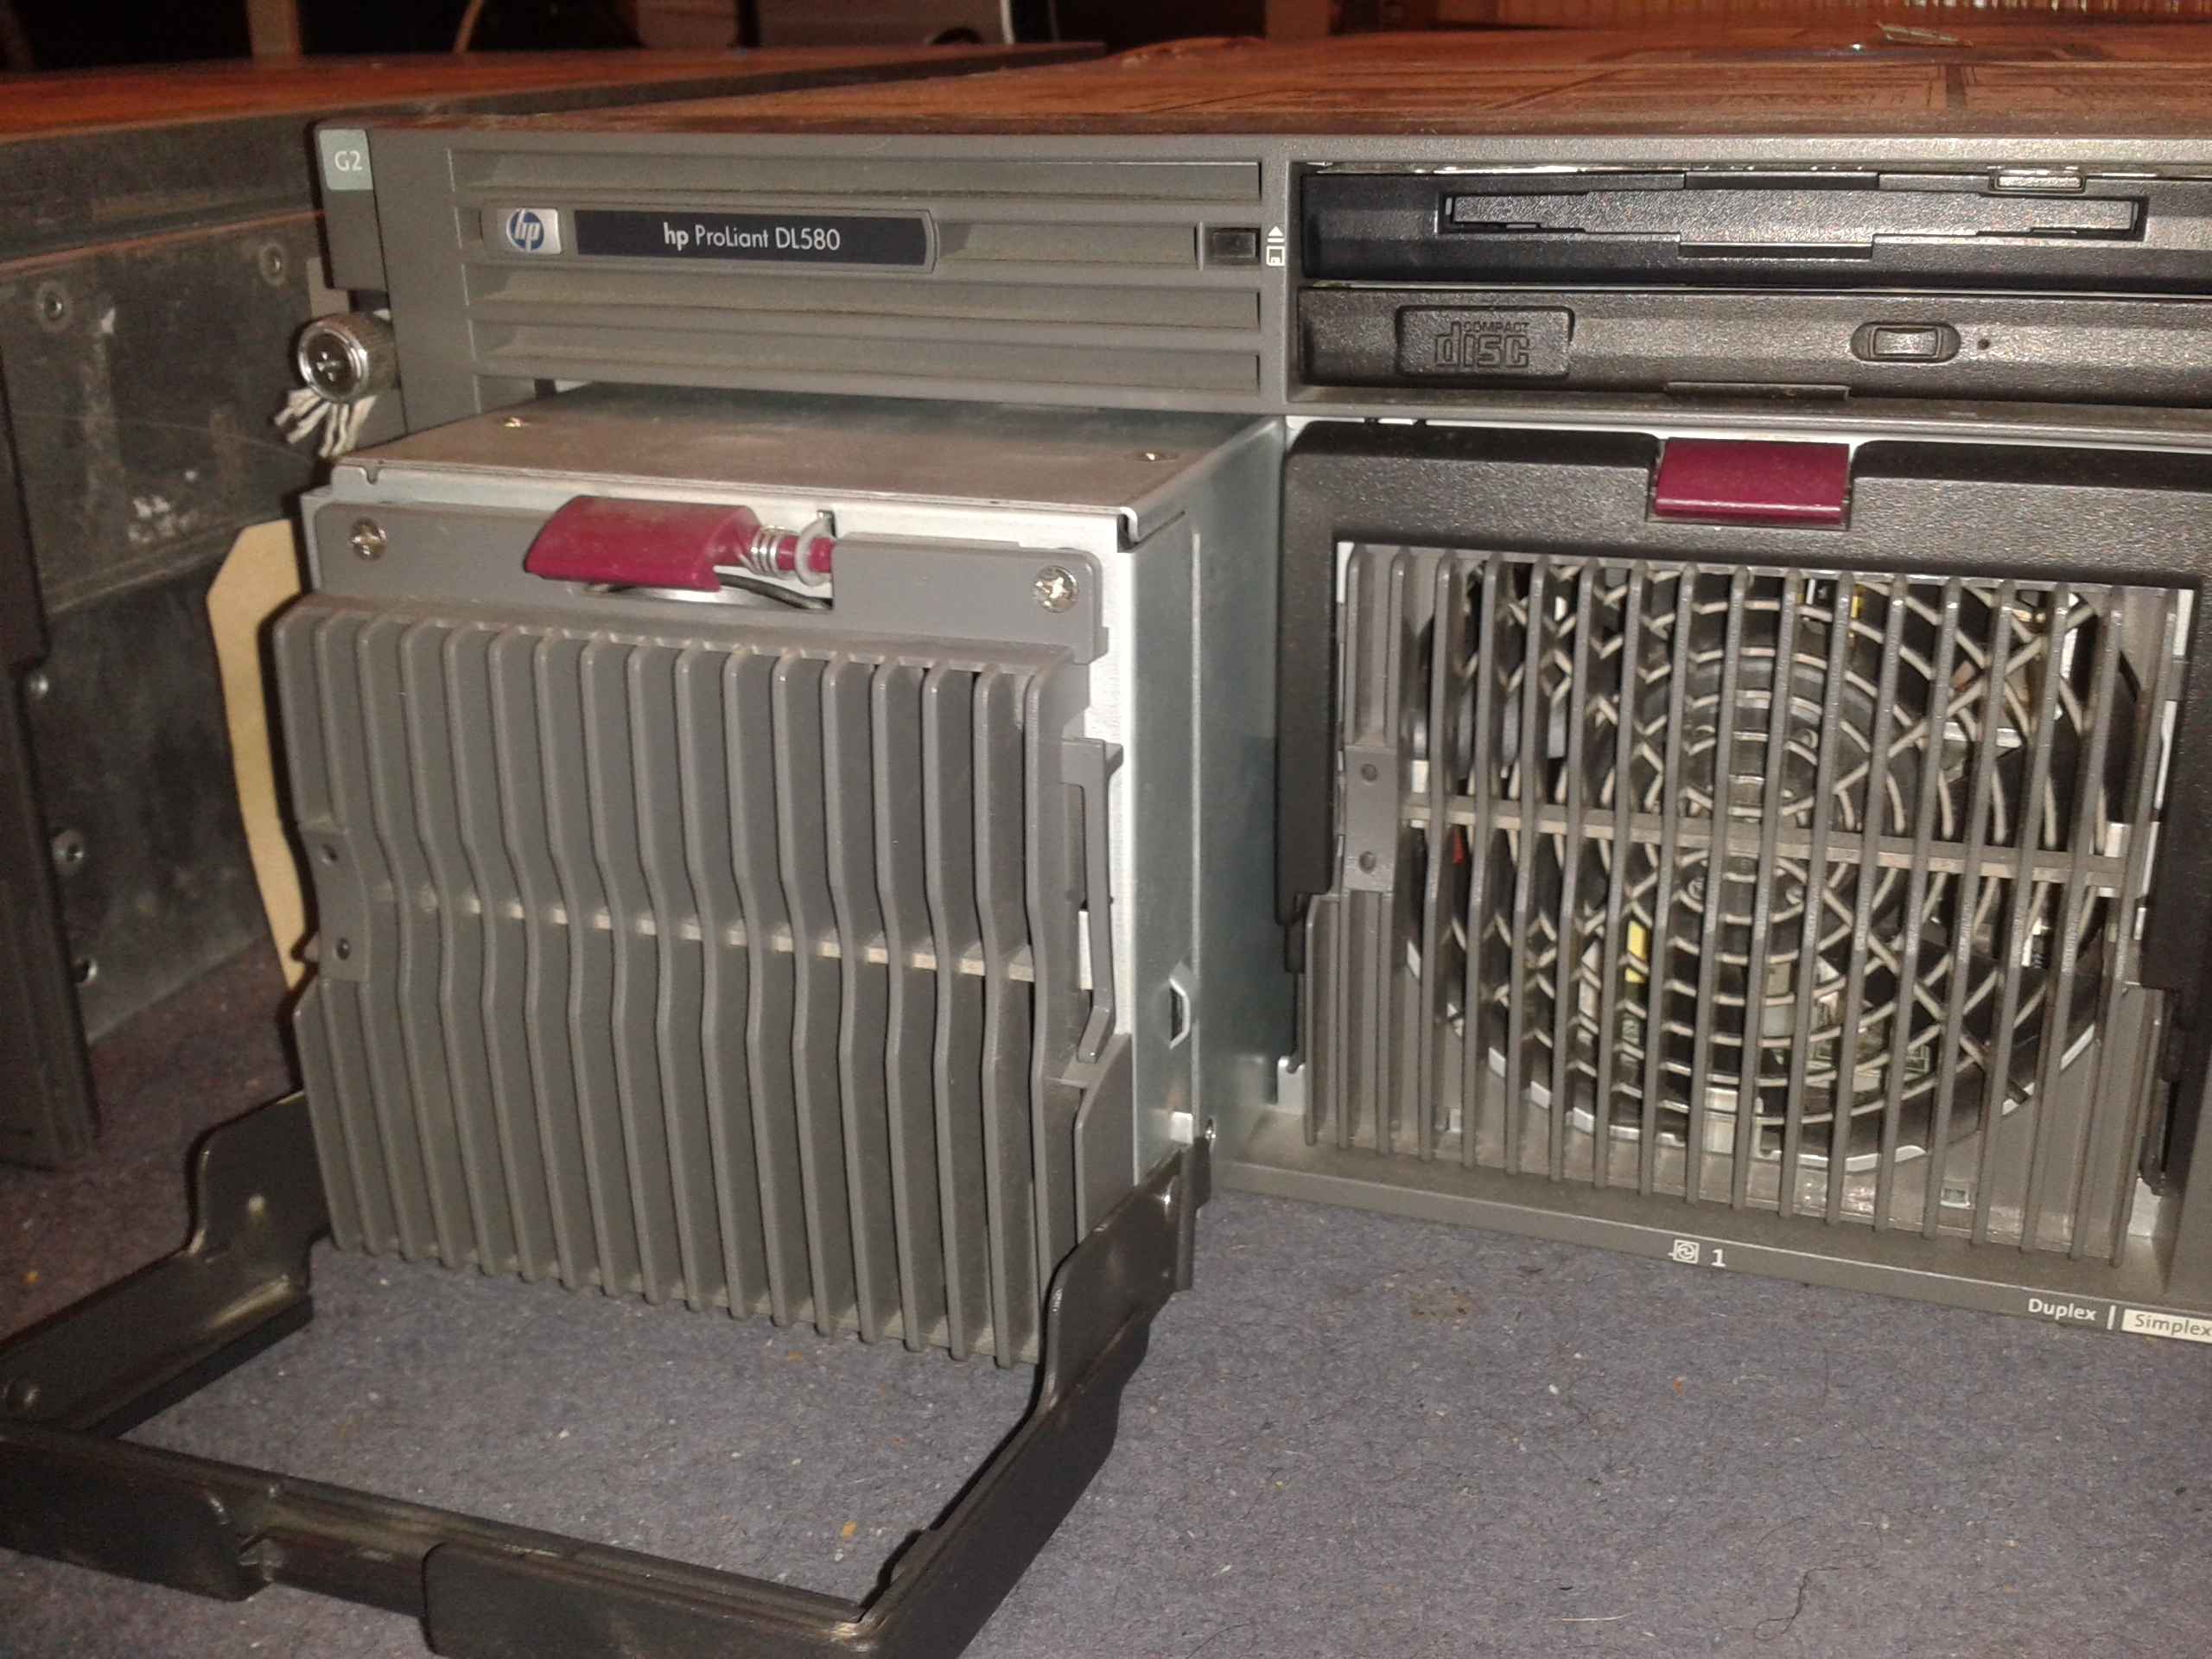
It targets easy accessibility for critical components like power supplies, hard
disk drives, as well as the floppy and CD-ROM drive for serviceability.
Sadly it does not have front VGA out and USB ports, which might come in handy if
on-the-spot service is required.

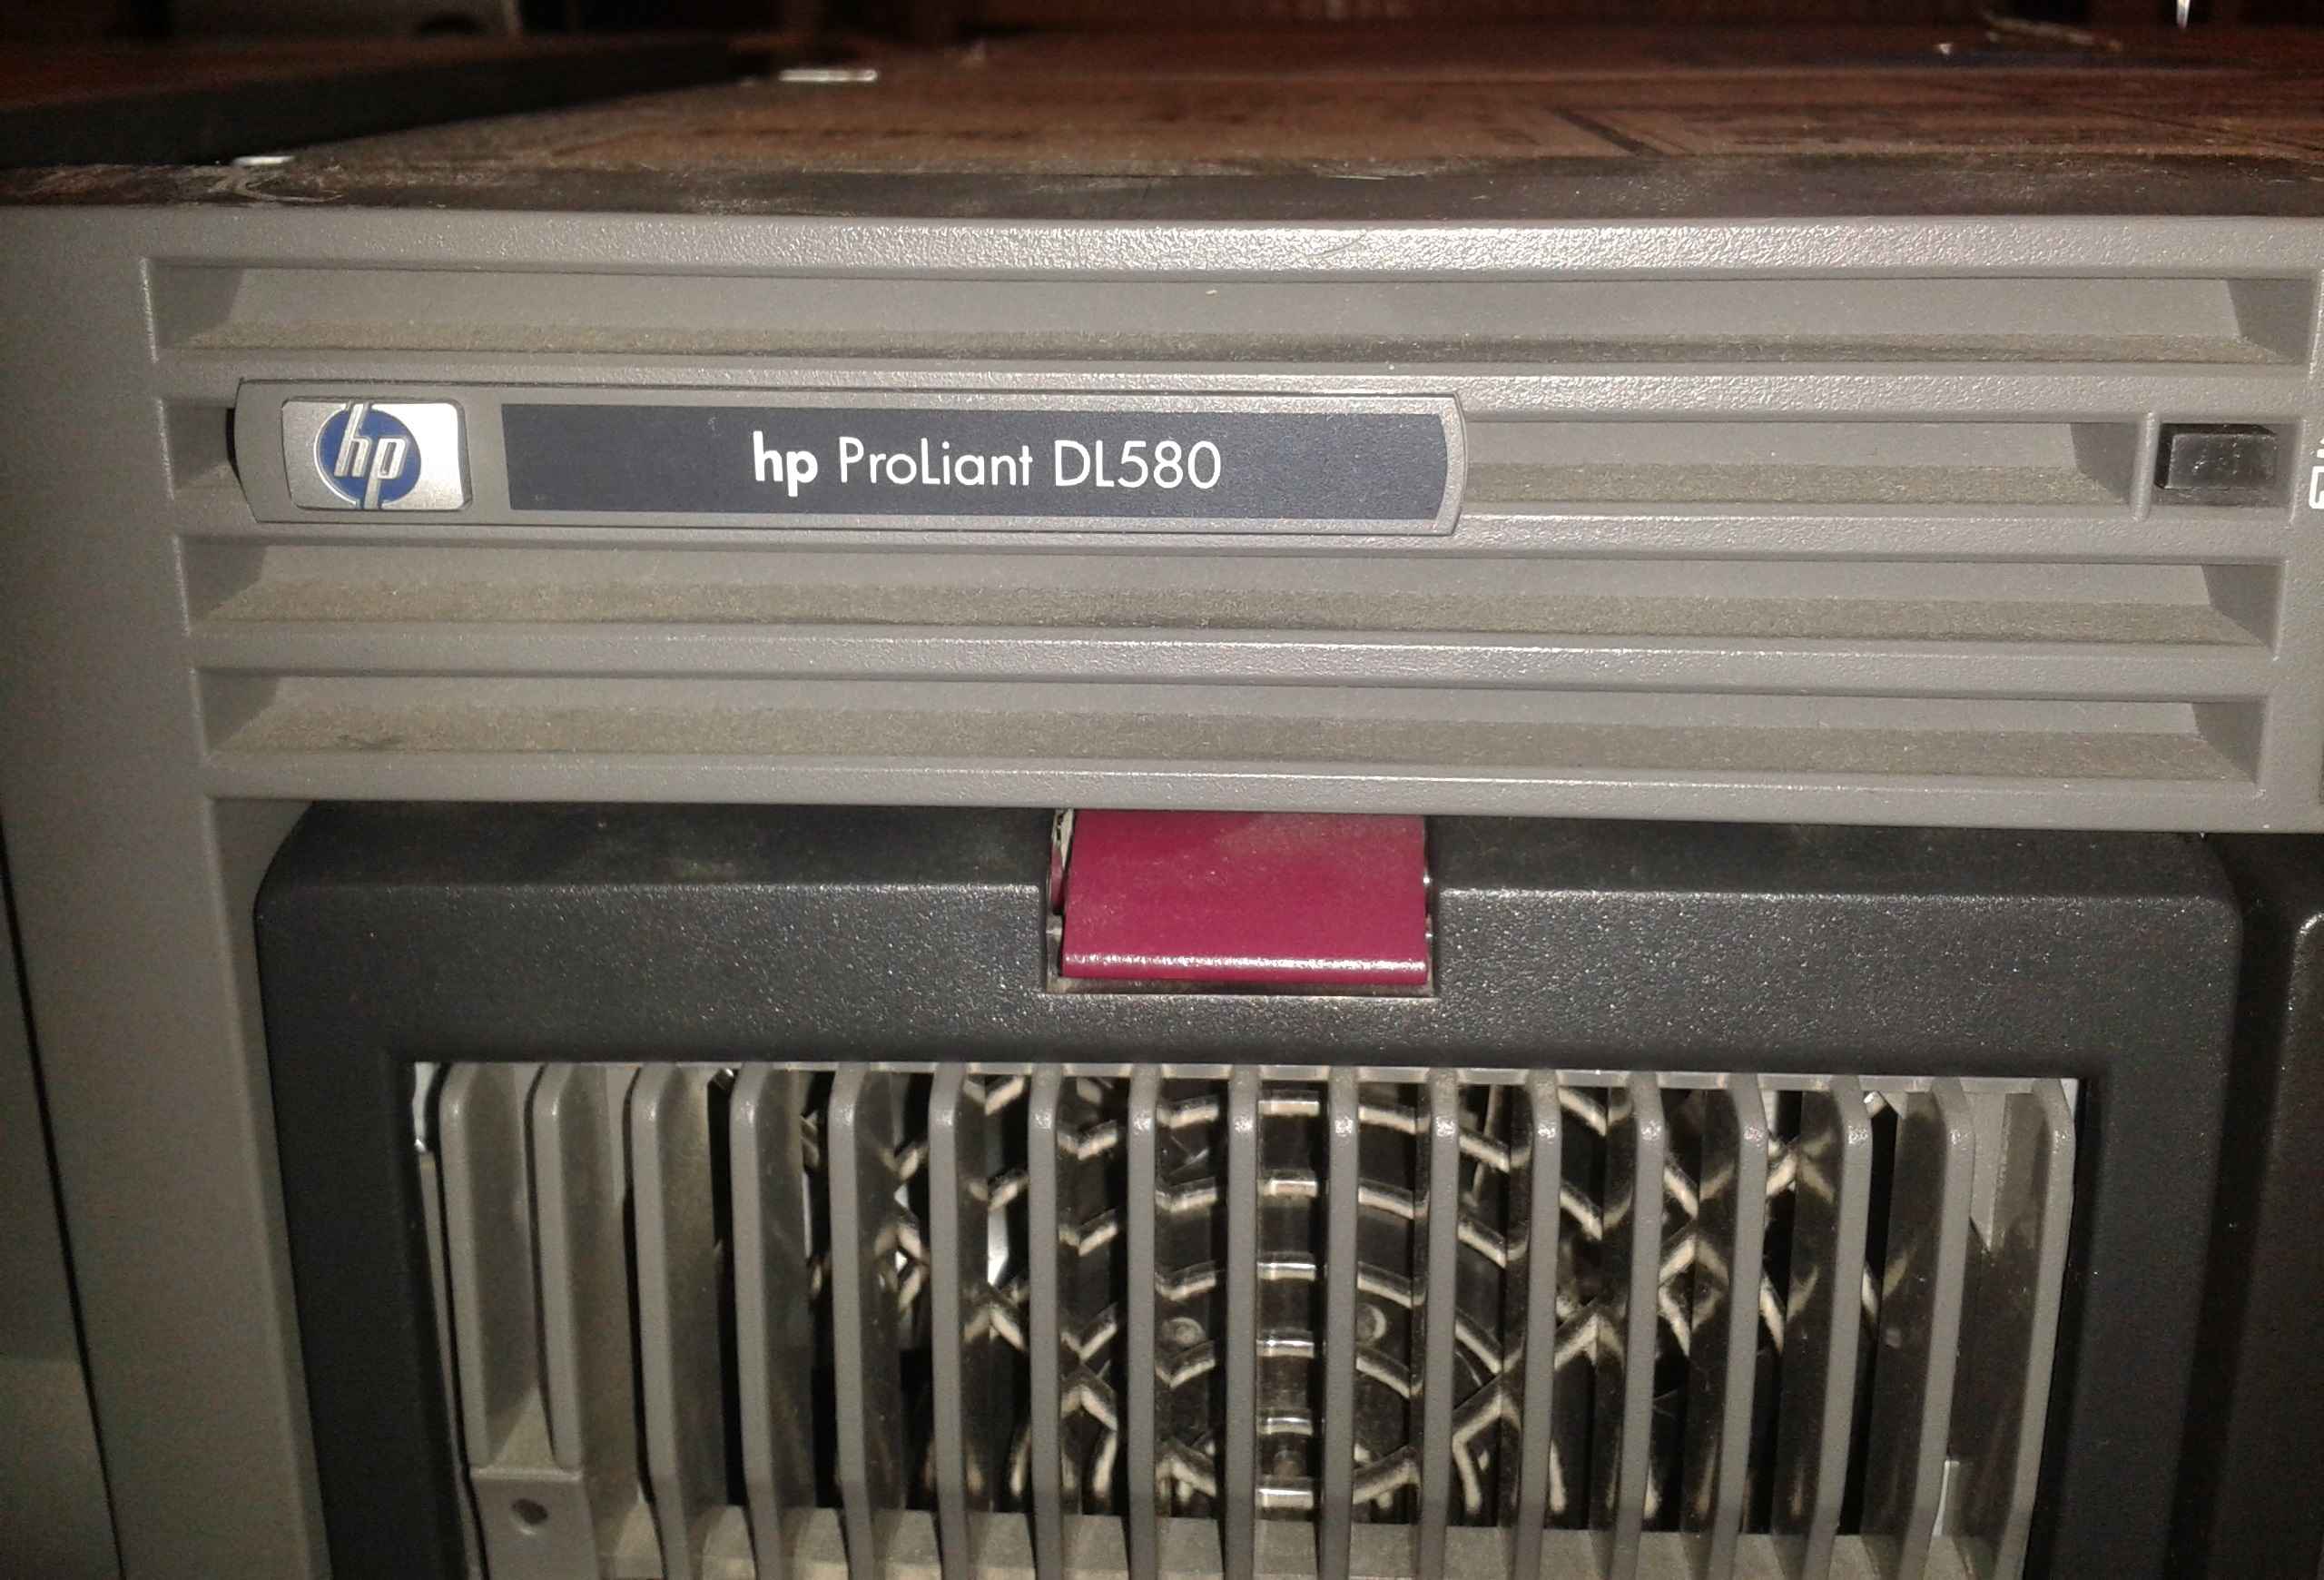
Above the left power supply is HP's trademark which
identifies the server series (Proliant DL580).
The power button, the HDDs and the diagnostic lights for power supplies are
located on the right side of the front panel.
Also note the screws on the sides used for fixing the server in position inside
the rack. The bottom of the panel has little
white markings which inidcate the power supply number (1 and 2) and the
configuration of the SCSI HDDs:
Simplex or Duplex - All 4 HDDs share one SCSI channel or 2 HDDs using channel A
and the other 2 using channel B.
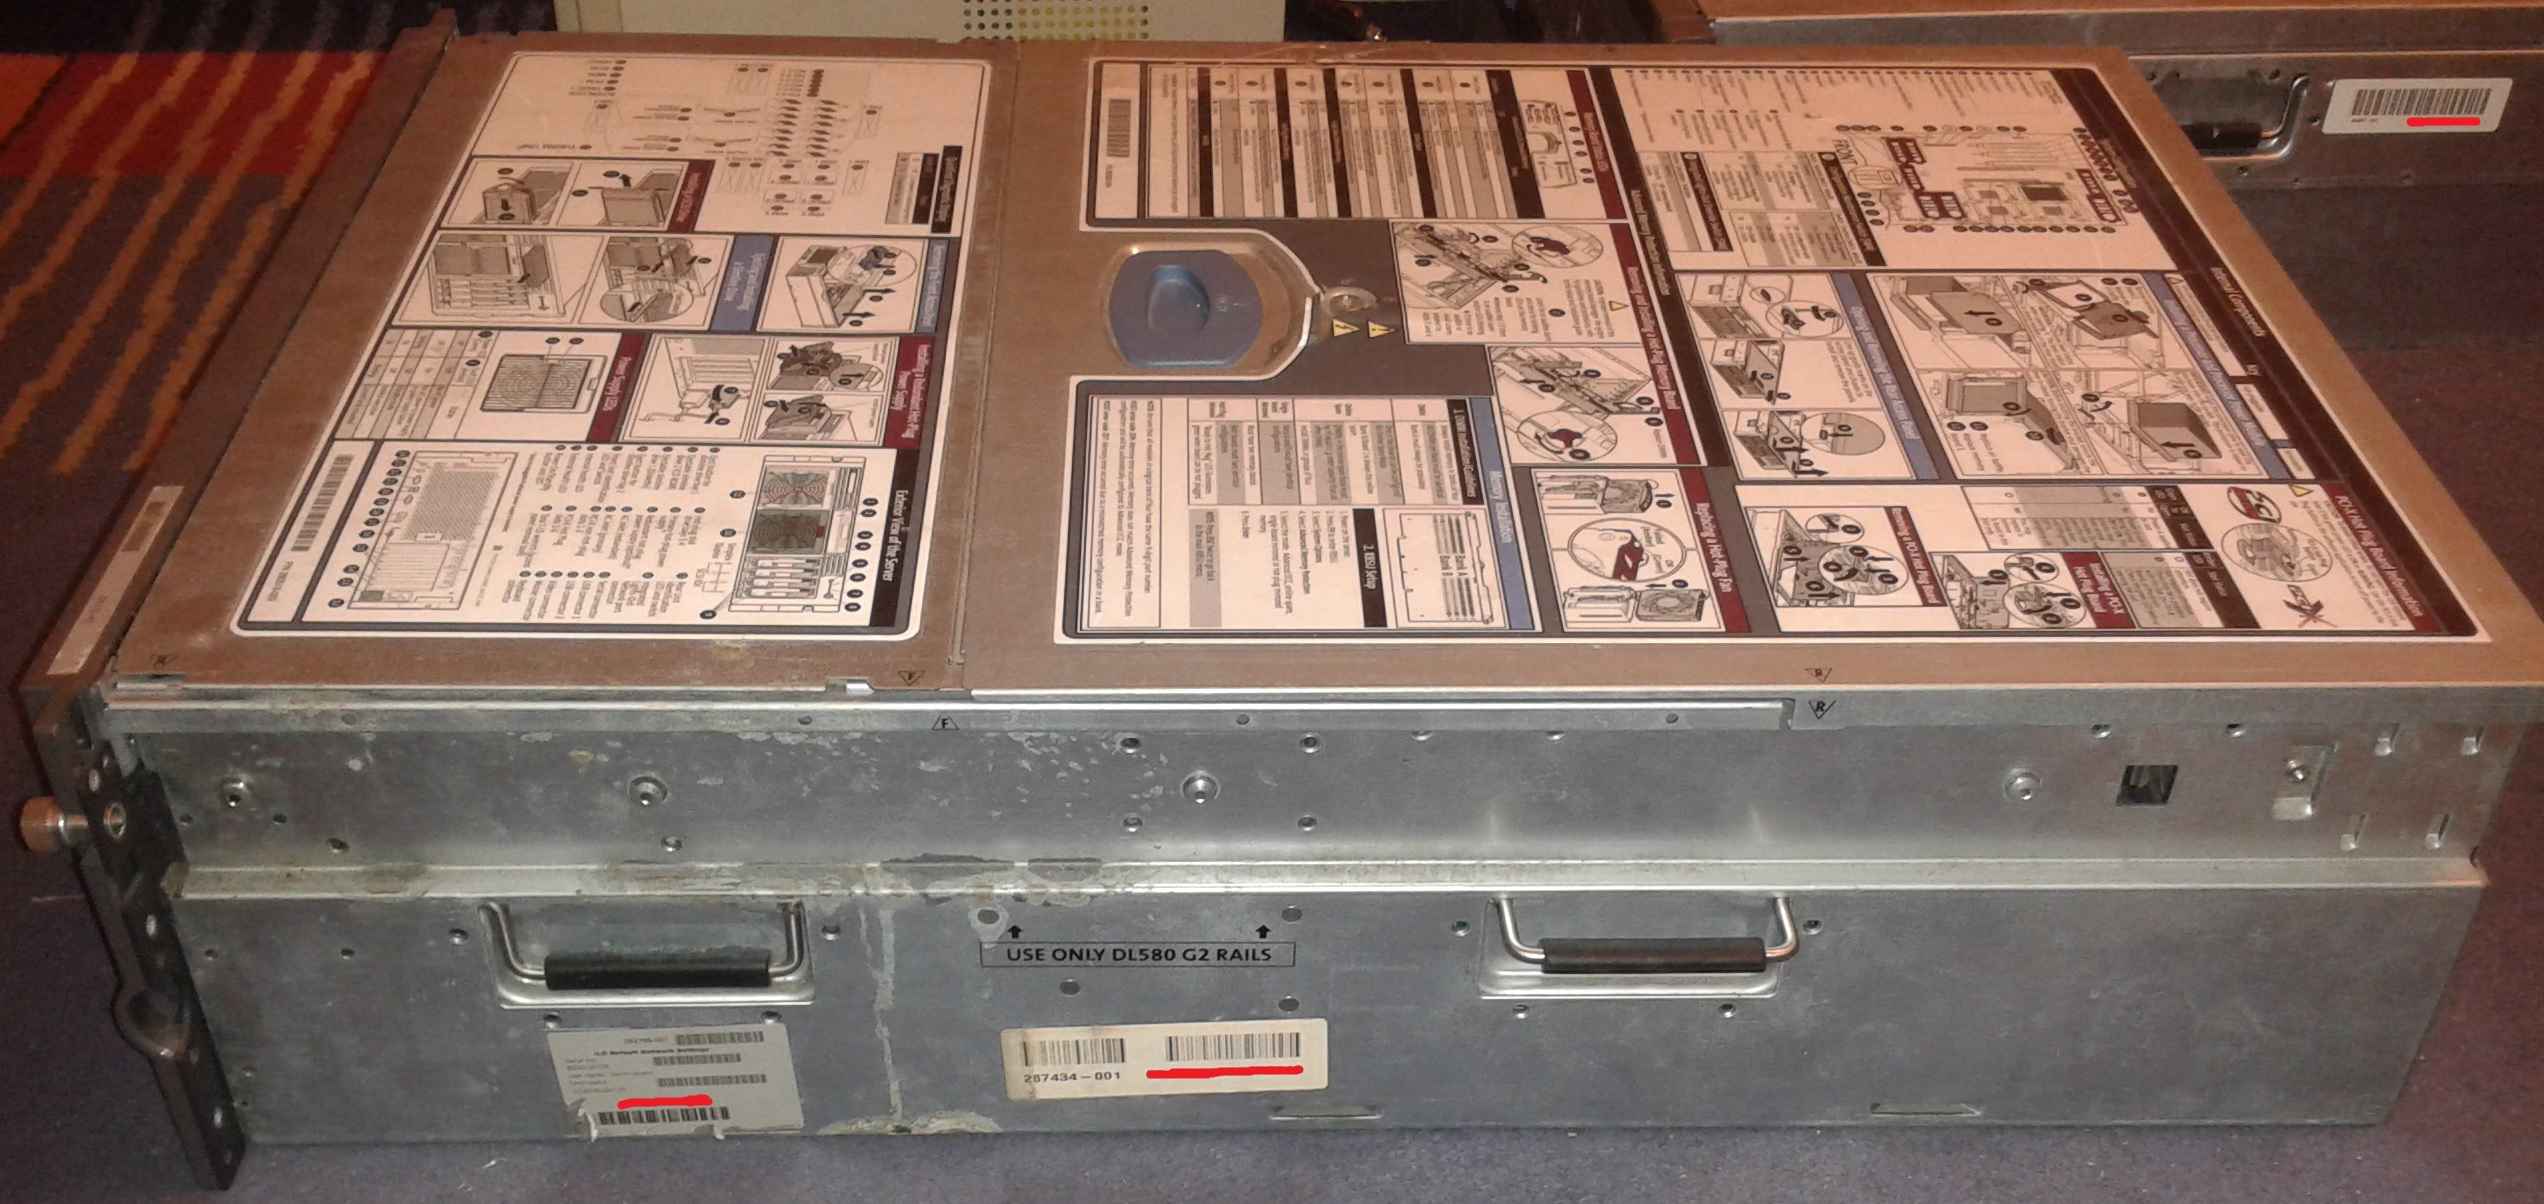
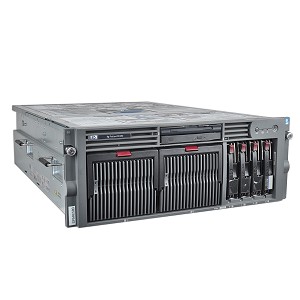
The sides can be equipped with a rail kit, which makes
hardware service easier when the server is inside the rack.
It has handles to make it easier to carry the server around. The whole thing
weights around 30-40 Kgs so it is
highly recommended to have 2 persons to move it. Note the damage on the chassis
surface: the previous owner
spilled some kind of an acid on it which left permanent damage on the steel.
The two stickers contain serial numbers and access information to the server's
HP iLO.
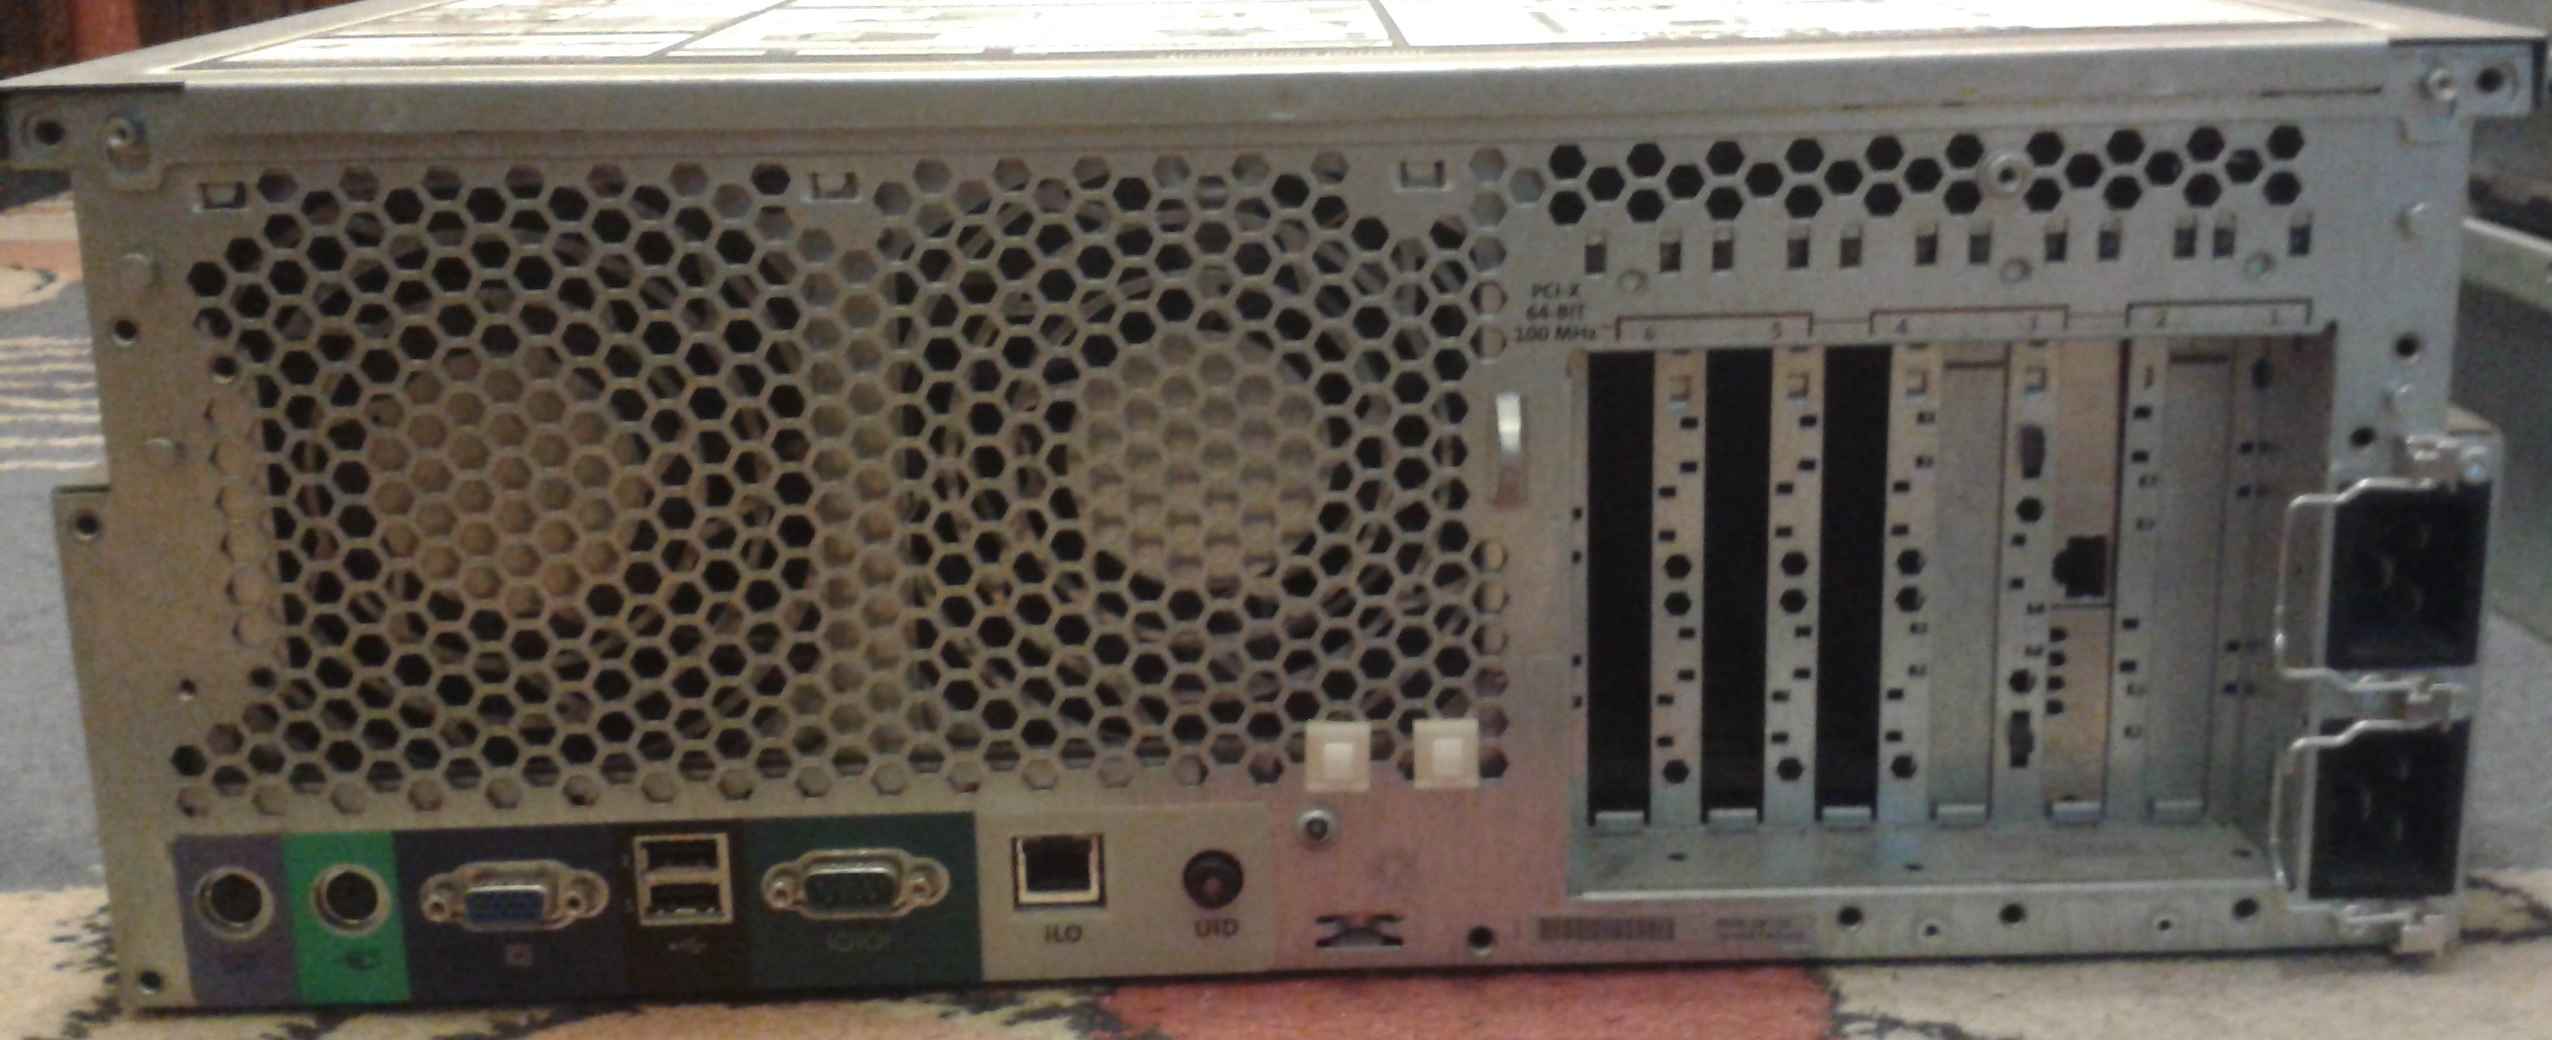
The back side has two fans: these fans blow the air
outwards from the CPU and memory section. Underneath
the fans are the motherboard connectors, from left to right: PS/2 keyboard, PS/2
mouse, VGA out, two USB 1 ports,
serial port, iLO port. I found it weird that this server has no onboard NIC; an
expansion card is needed
if you want to connect it to a network. The I/O cards are located on the right
side, as well as the two IEC C19
power supply connectors.
The PSU connectors have retaining clips which help to keep the power cables in
place (so you can't unplug them accidentally).
To reach the interior of the server, you need to open its
top panel. It is separated to two sections, the smaller part
(at the front of the server) provides access to the media bay (CD and Floppy),
SCSI backplane and the hardware led/lcd diagnostics.
The larger part of the top panel can be opened with the blue handle. You need to
push it towards the back,
then you can slide the cover towards the front of the server. After this, you
gain access to the rest of the internal components.
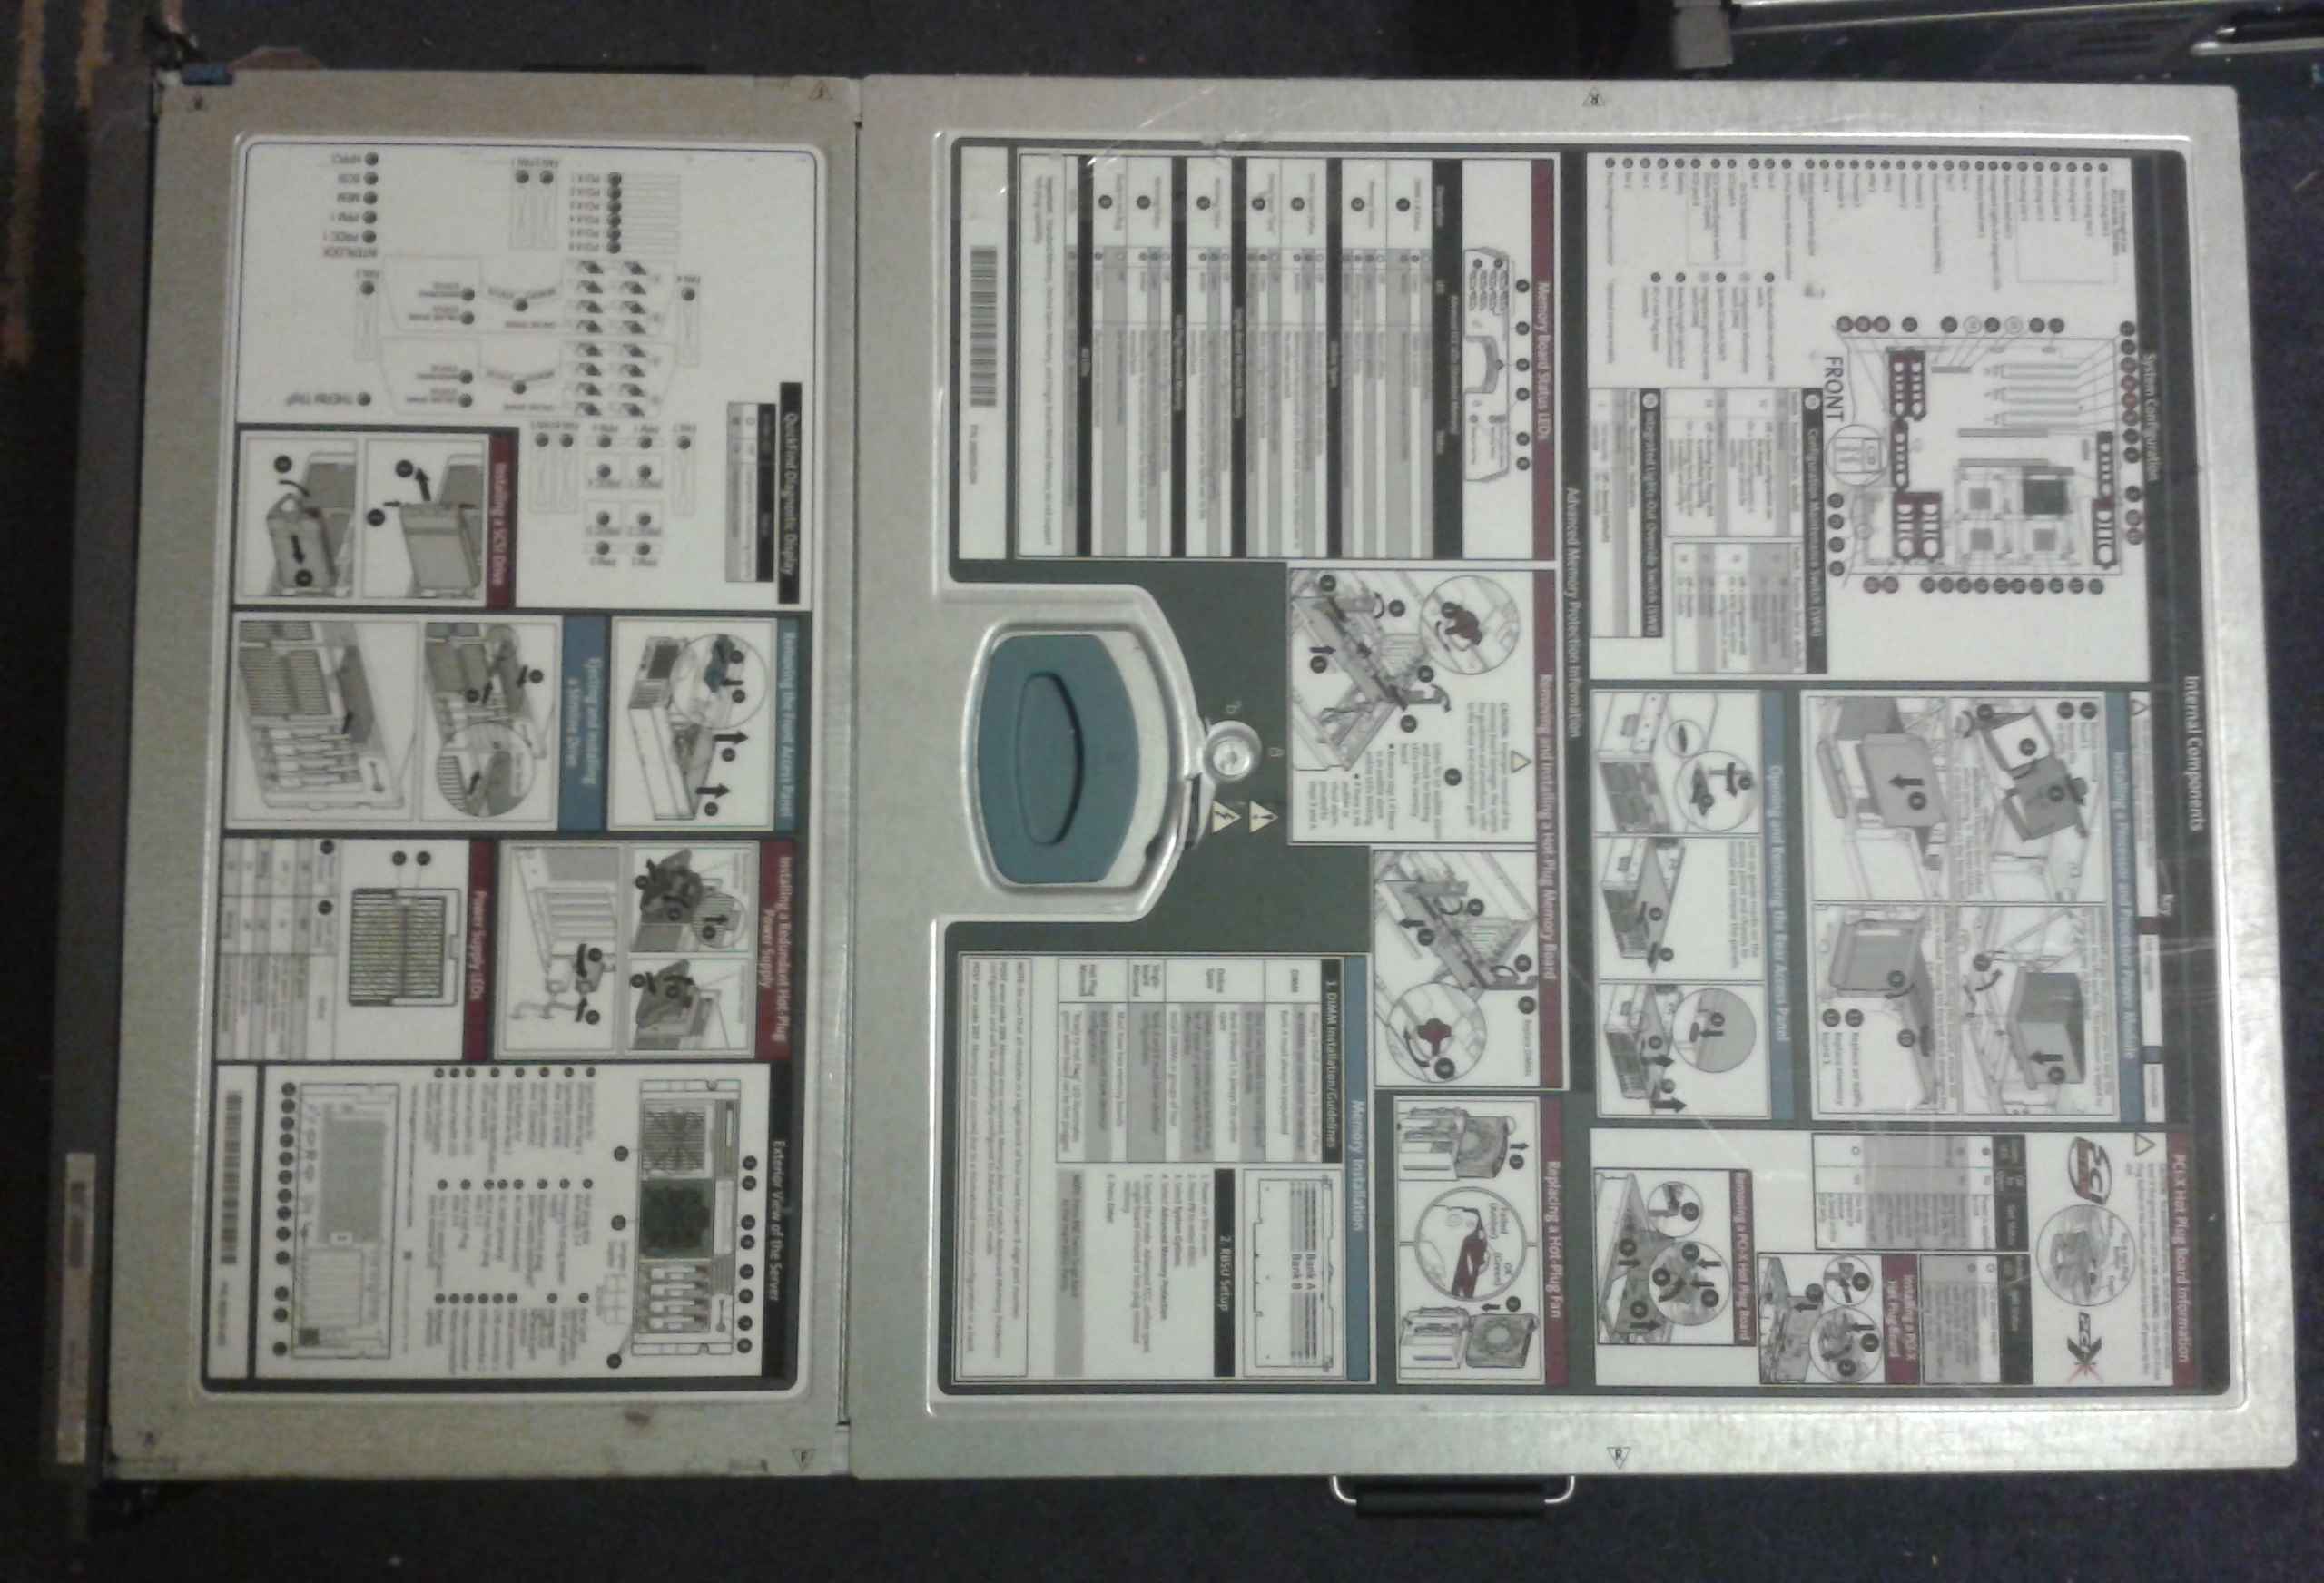
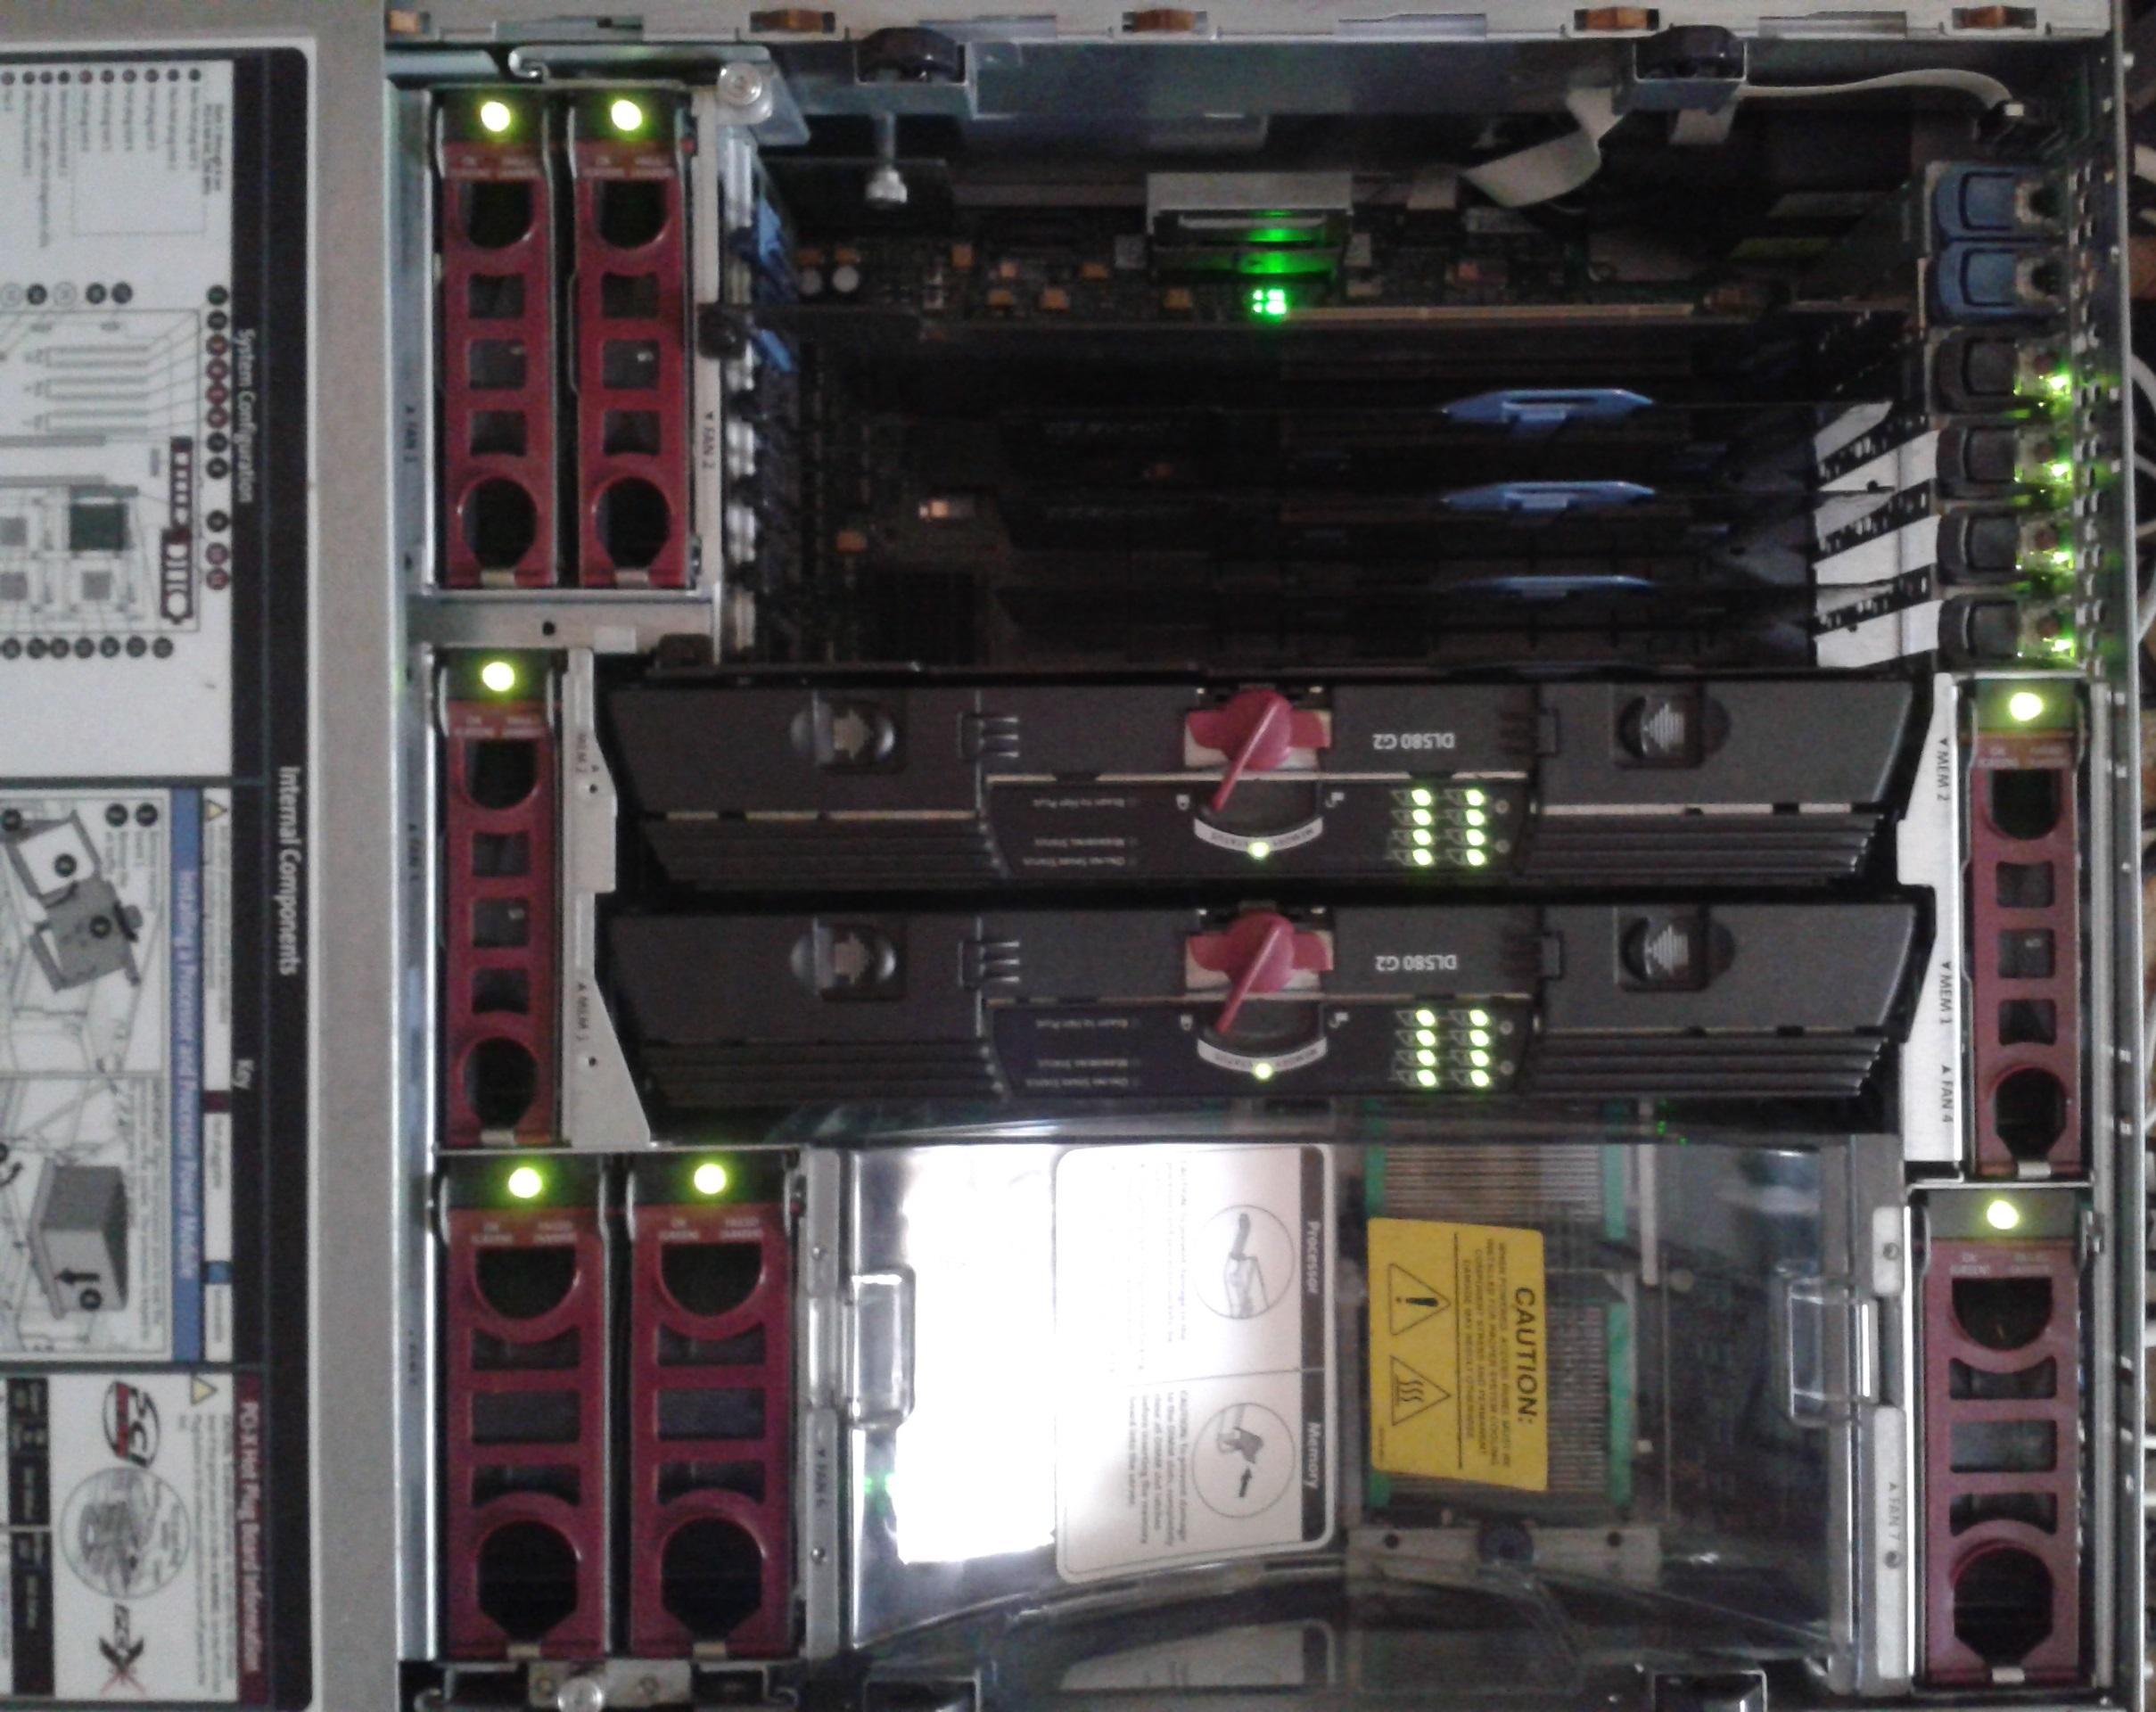
The surface of the cover is not wasted; basic service instructions are printed
on it.

The interior is divided into 3 zones: I/O
card zone, RAM zone and CPU zone. This is done to ensure proper cooling,
I will talk about this later on at the fans section of the article. The PCI-X
expansion card zone allows you to install six,
Full Height (FH), Full Length(FL) cards. The slots with the black retaining
clips are hot-pluggable, whereas blue ones aren't.
The little buttons on the black clips are used to turn off power to the PCI-X
slots, ensuring safe removal of the cards.
My server also has the airflow basket accessory, which better directs the
cooling air among the expansion cards.
The middle section contains the memory boards. The second memory board (closer
to the I/O section) is optional, but
needed to reach the full 32GB capacity. Then, the last section houses the 4 CPUs.
The architecture allows the server
to run with either 1,2 or 4 installed CPU configuration. The CPUs are covered
with a transparent plastic air baffle,
which (similar to the airflow basket accessory) helps to focus the airflow
through the CPU heatsinks.
For basic service or component replacing operations, both the interior and
exterior are tool-less serviceable.
Only advanced operations (like the removal of the system board) need some basic
tools.
The above solutions result in a very flexible and excellent design, giving the
ability to scale the server
regarding the performance needs.
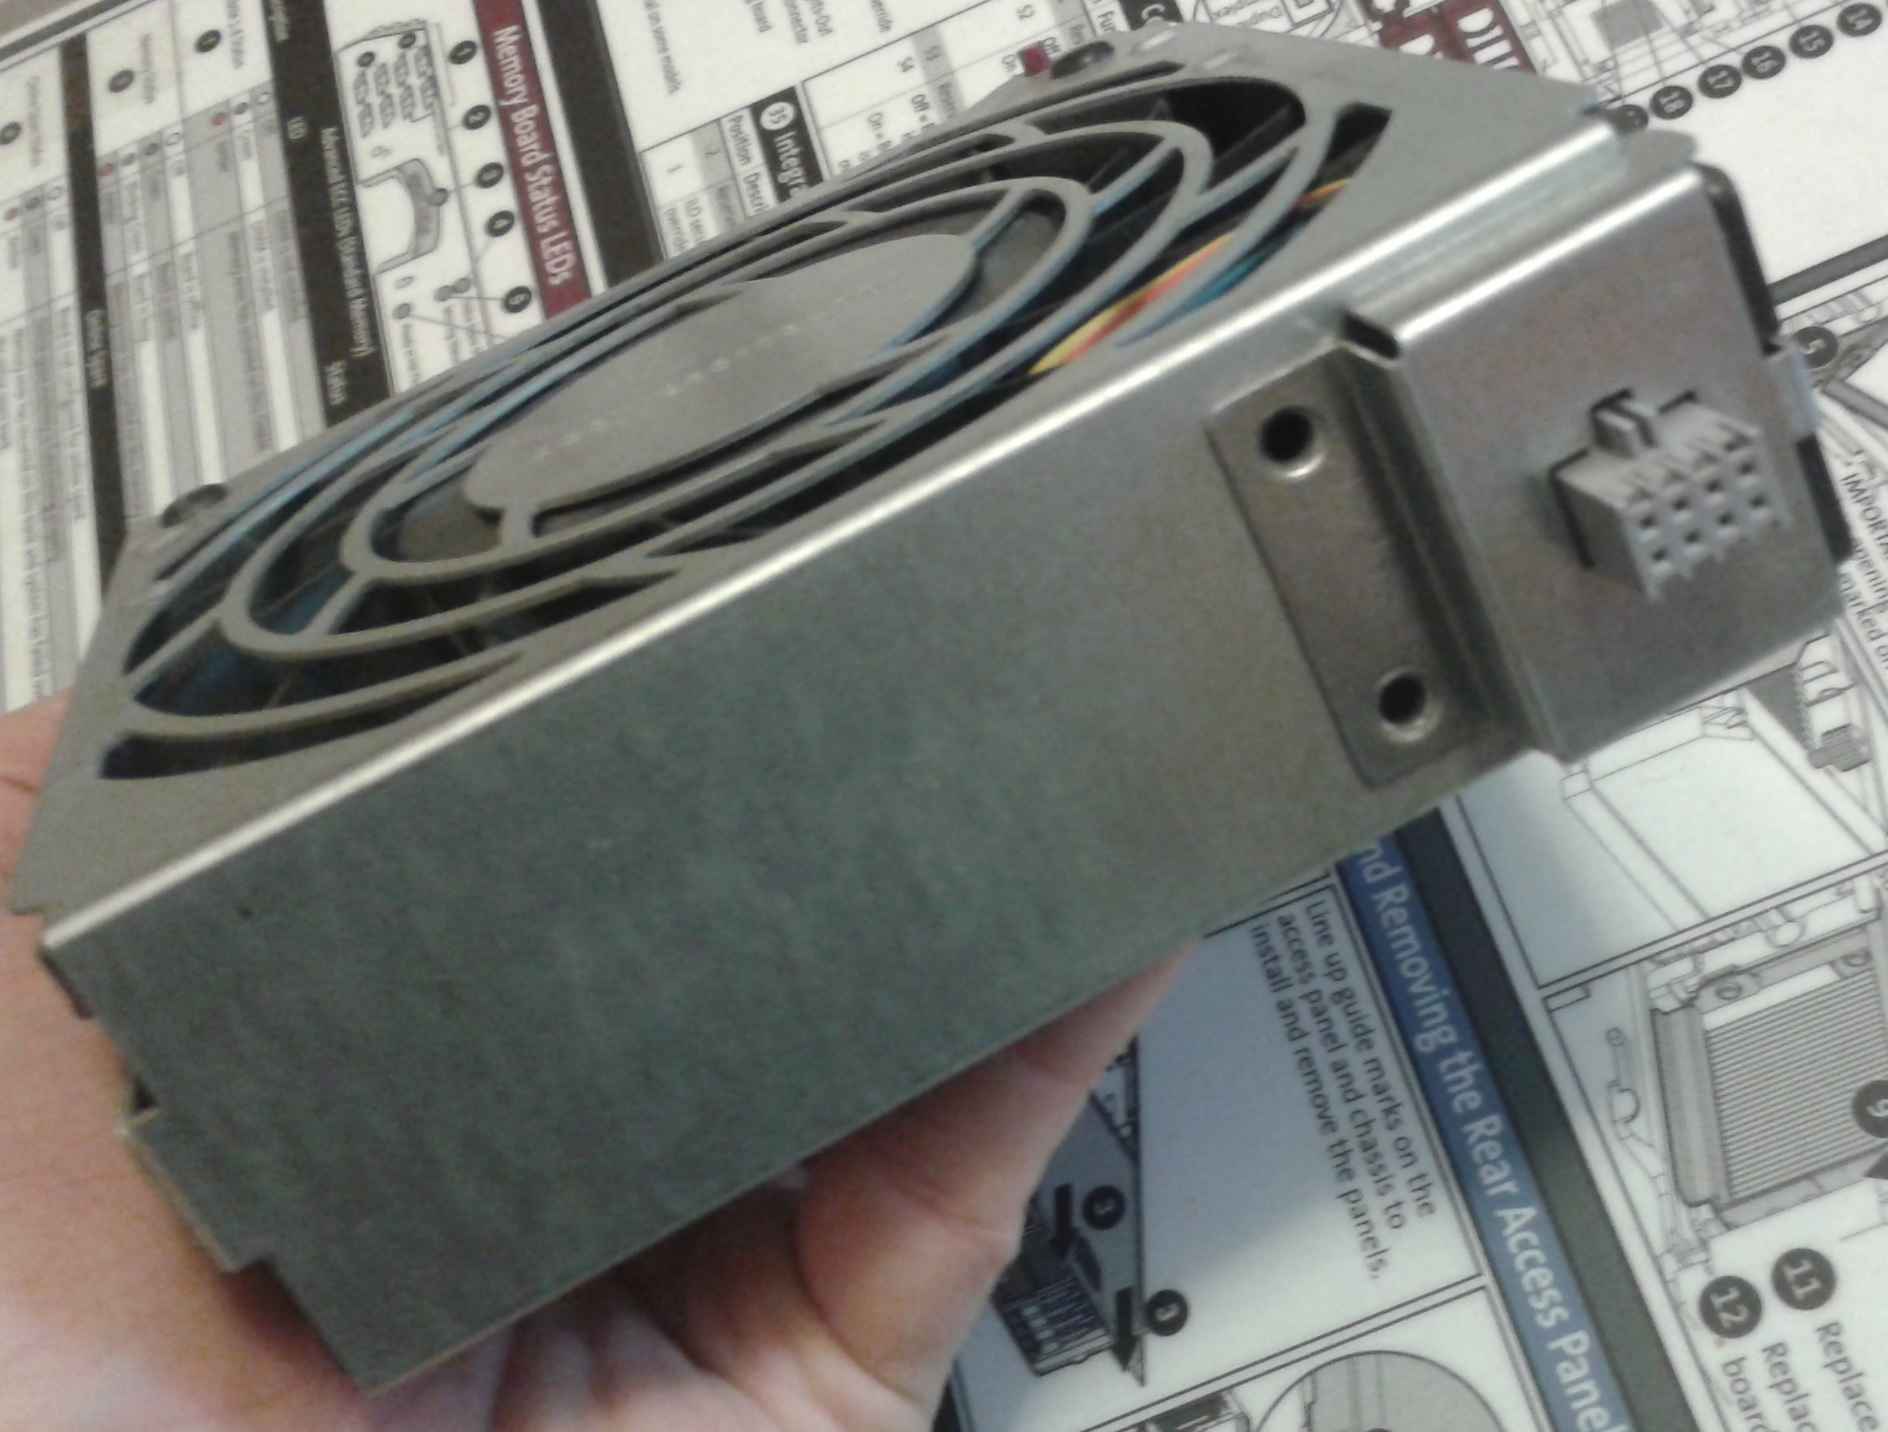
The 3 cooling zones contain 7 fans total.
The redundancy allows one fan failure in each section, and each section
needs at least 1 functional fan for proper cooling. Two types of fans are used,
slim ones are located at the I/O and
memory zone, and thicker fans are at the CPU zone. The slim fans have 3 vanes,
the thick ones have 9.
Both types use a 8-pin connector. The fans can be removed by pulling them out
using the red handle on them.
A diagnostic led indicates status: green is lit if the fan is working all right,
and amber is lit if it is malfunctioning.
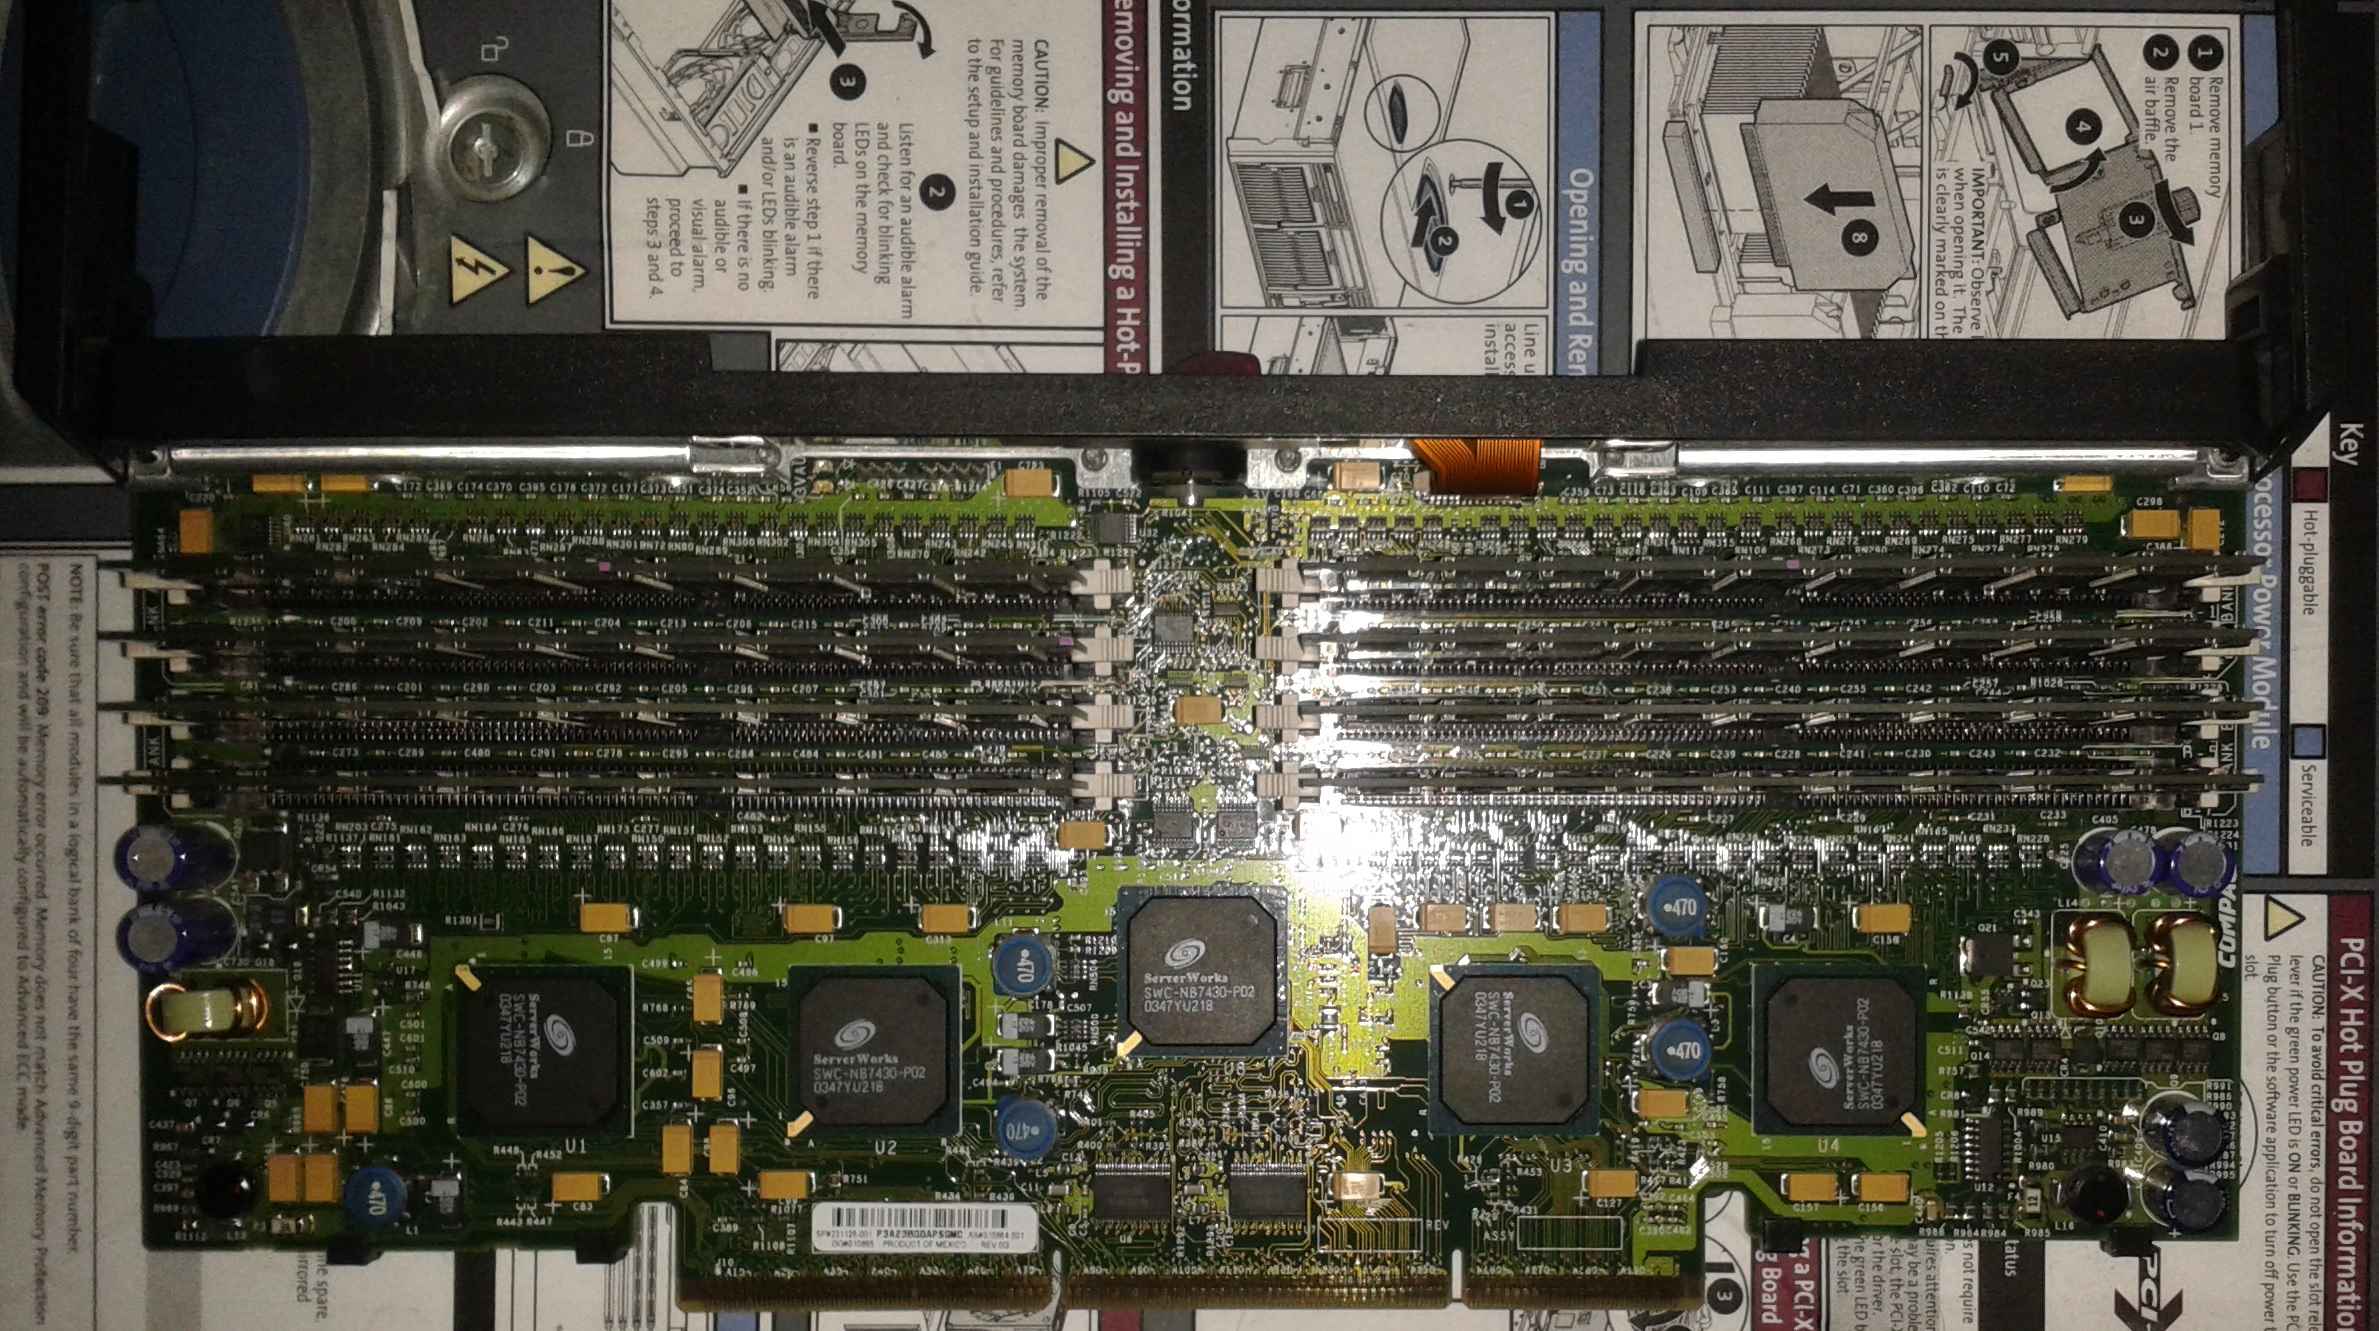
The memory boards can be removed the
following way: turn the locking lever to unlocked position, then push the
notches
at both sides in the arrows' direction, and then use the handles to pull out the
memory board. Each board has 8 DIMM
slots: the upper 4 DIMMs belong to BANK A, the lower 4 DIMMs belong to BANK B.
BANK A must always be populated first, and at least 4 DIMMs always need to be
present (BANK A full).
The boards accept PC1600R DDR 200mhz ECC modules, but faster modules can also be
used with their performance
degraded to PC1600 level. Each DIMM (1-8) has its own diagnostic LED, which
indicates memory status.
Memory boards always need to be removed before accessing the CPUs. They block
the removal of the
CPU air baffle.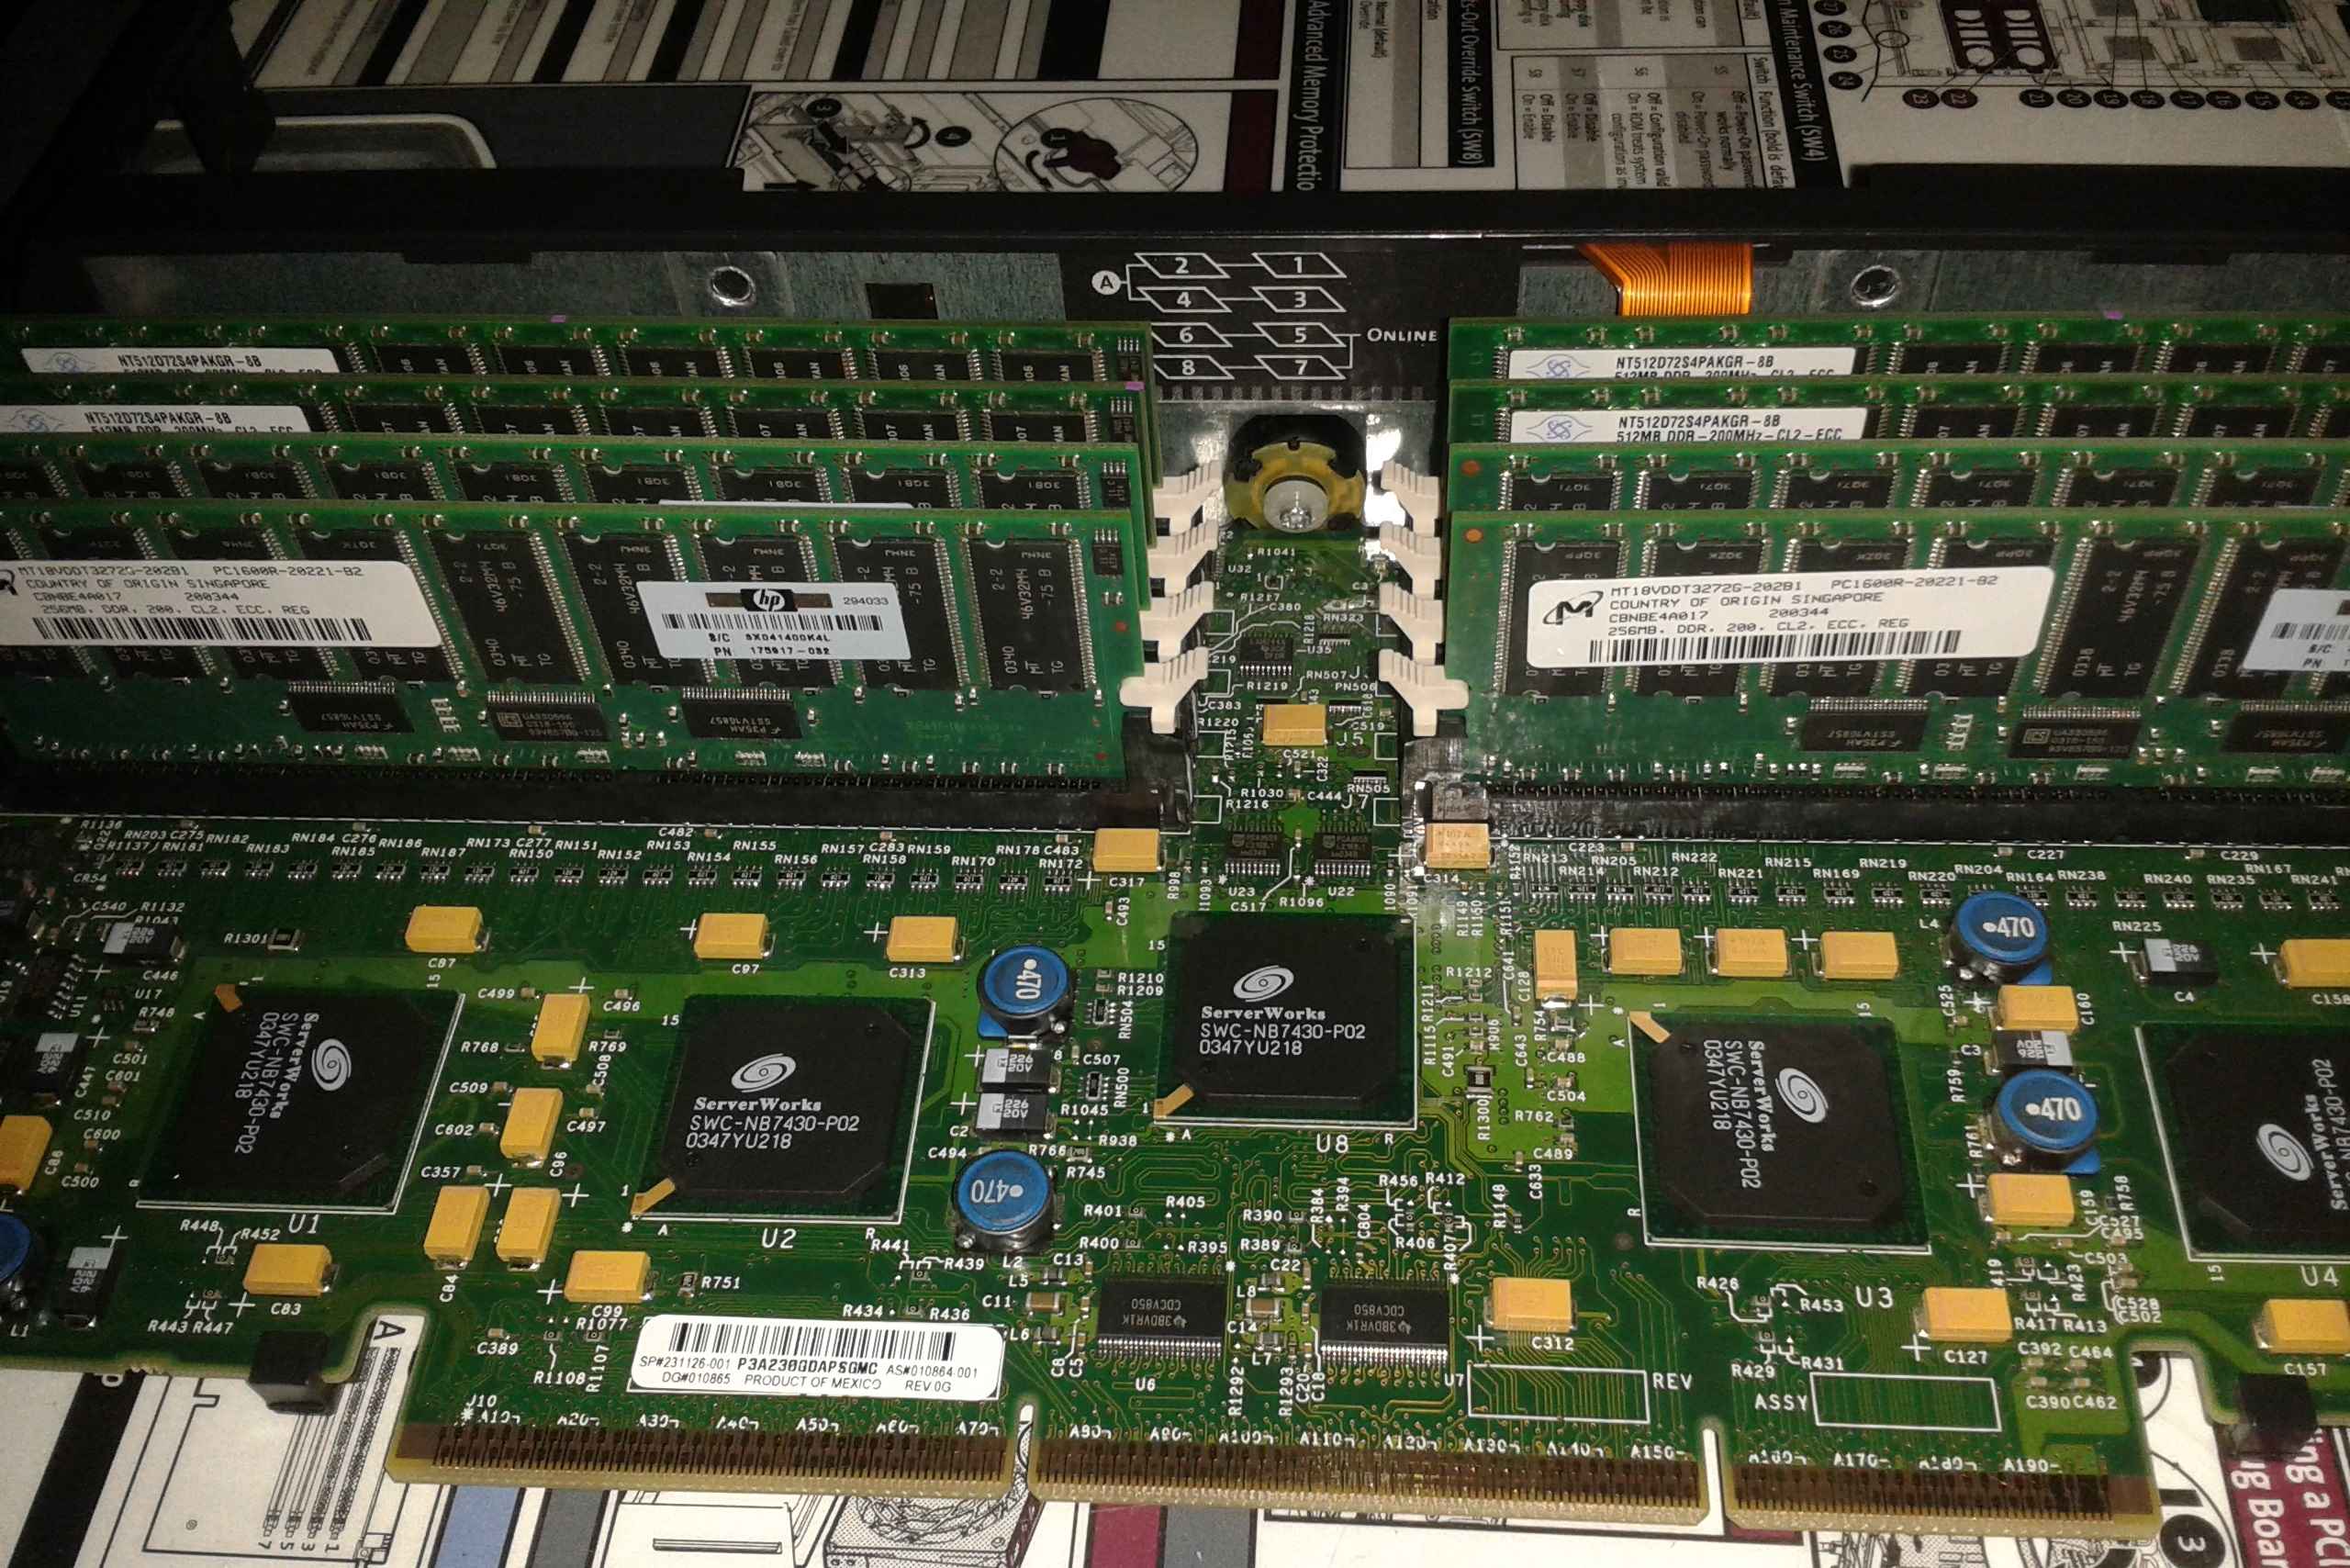
My server has 11GB RAM installed (8x1GB [board 1], 4x512MB and 4x256MB [board
2]).
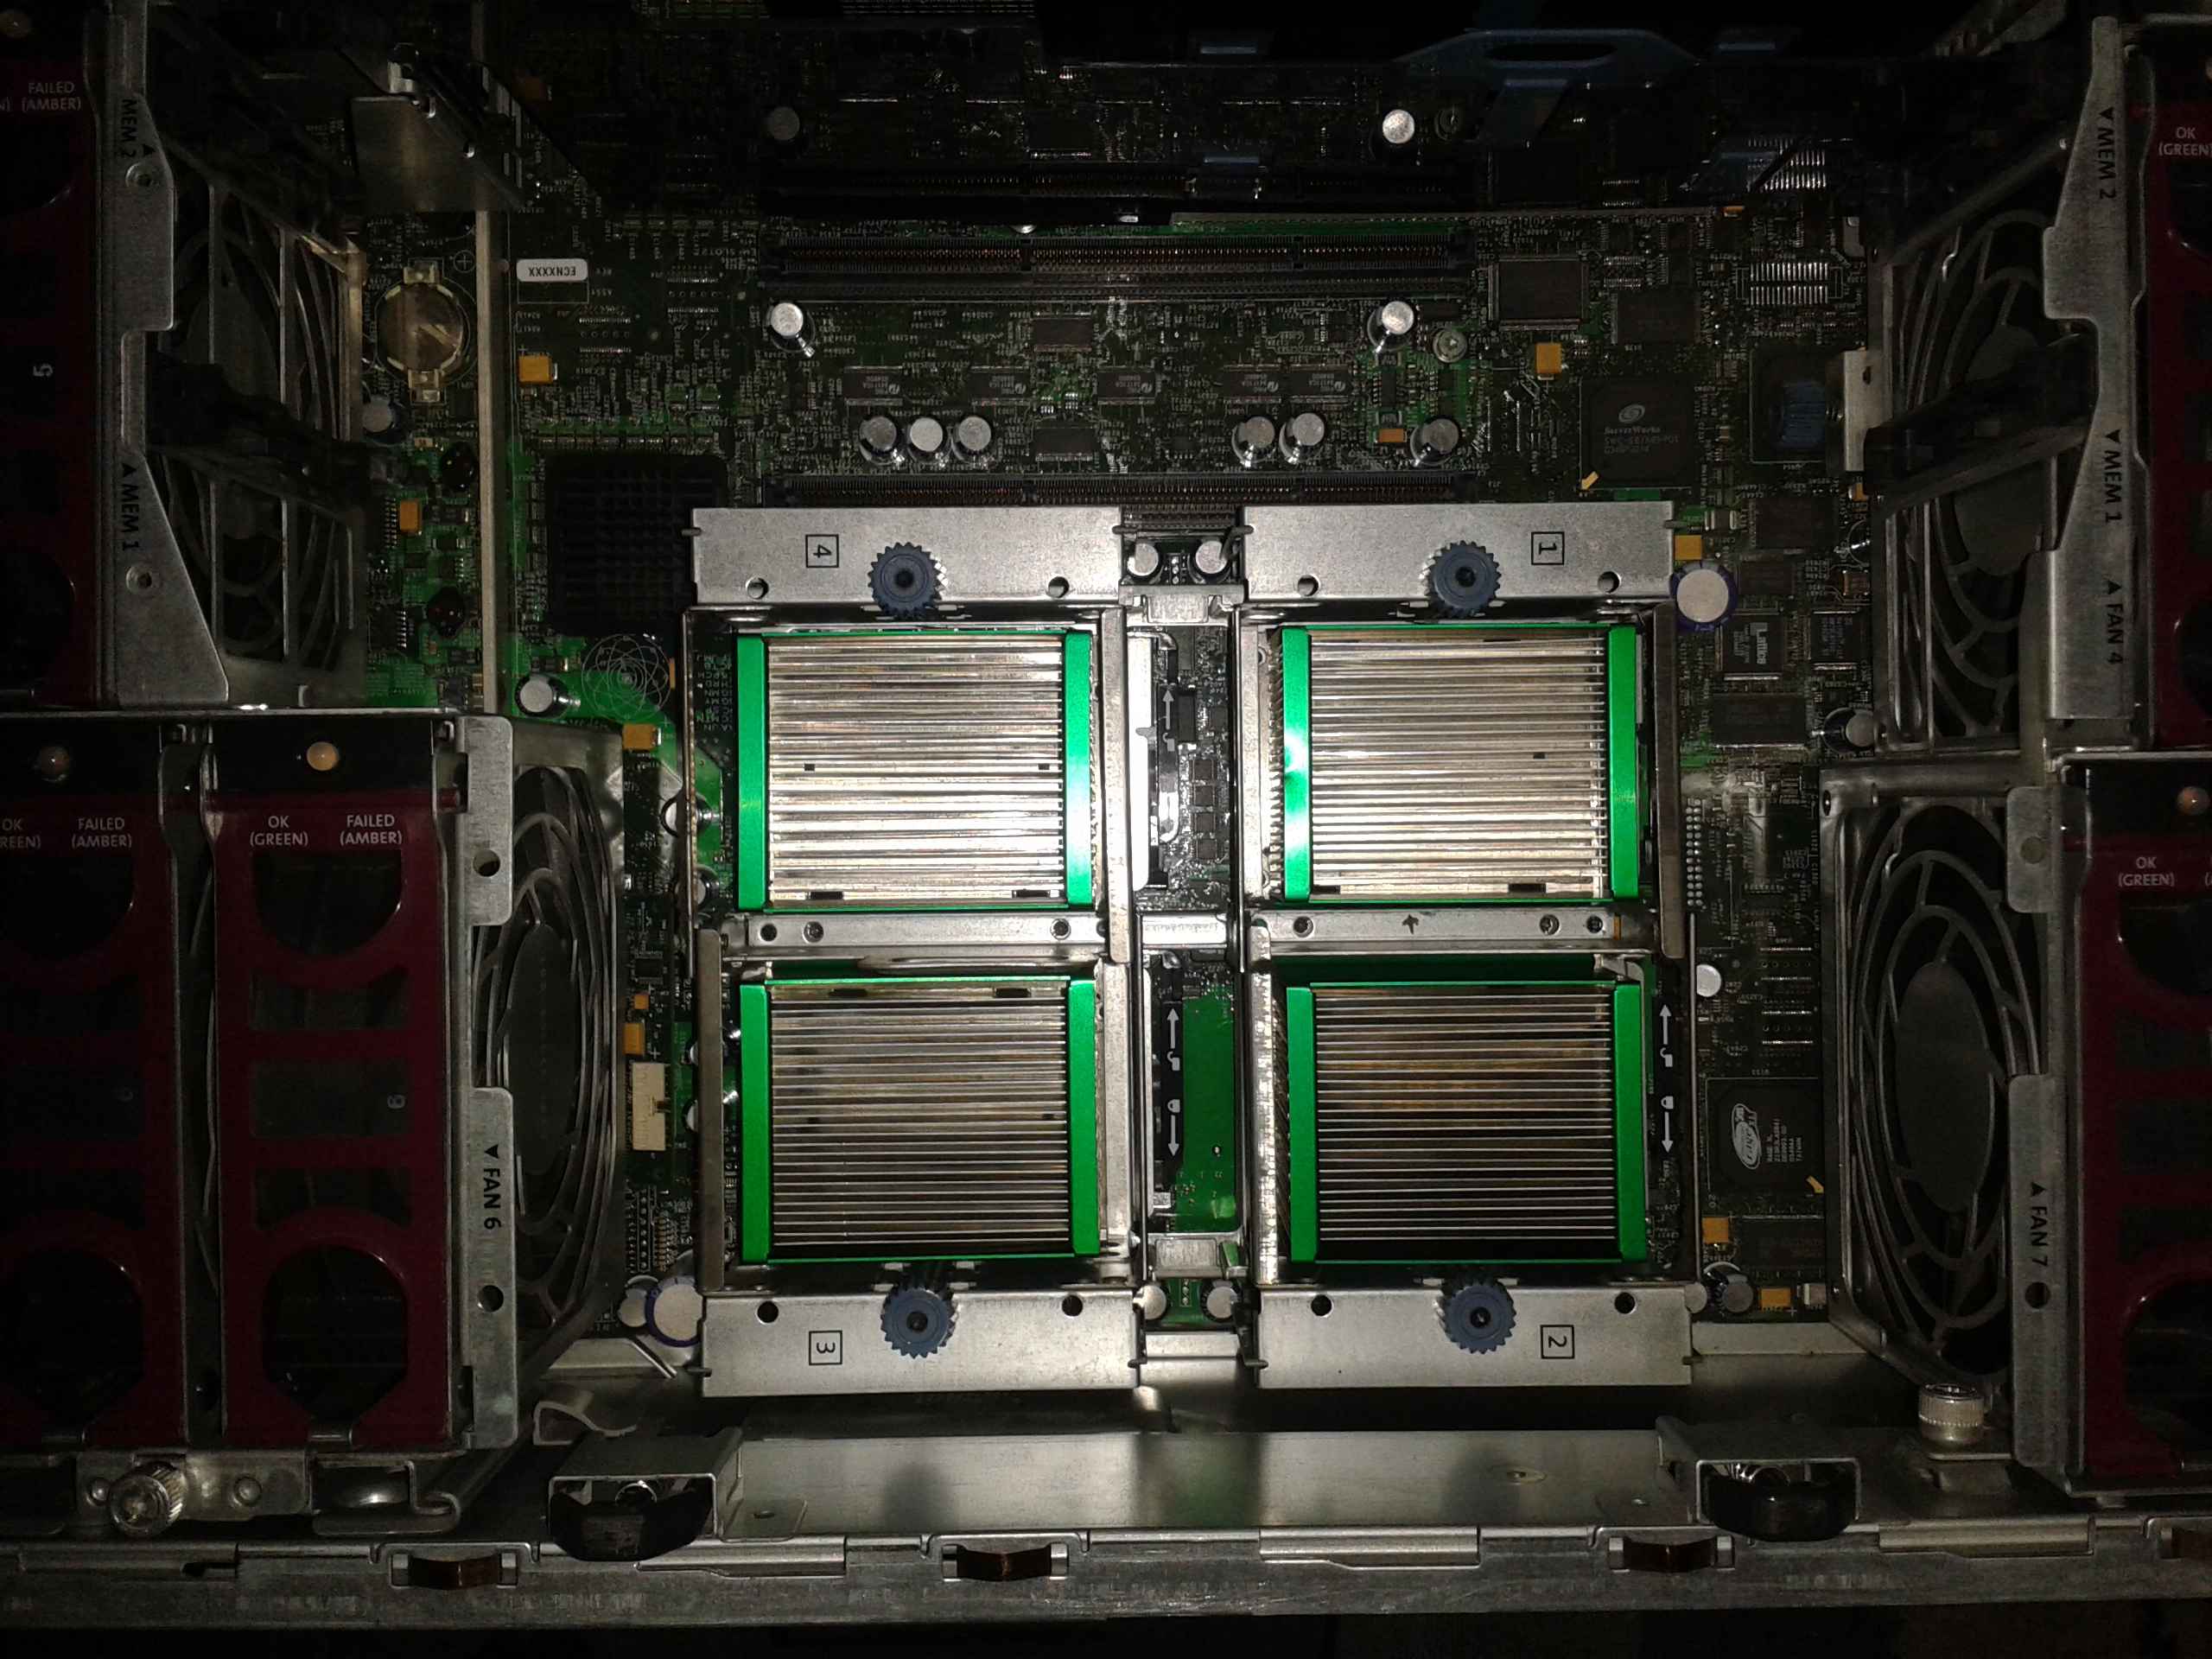
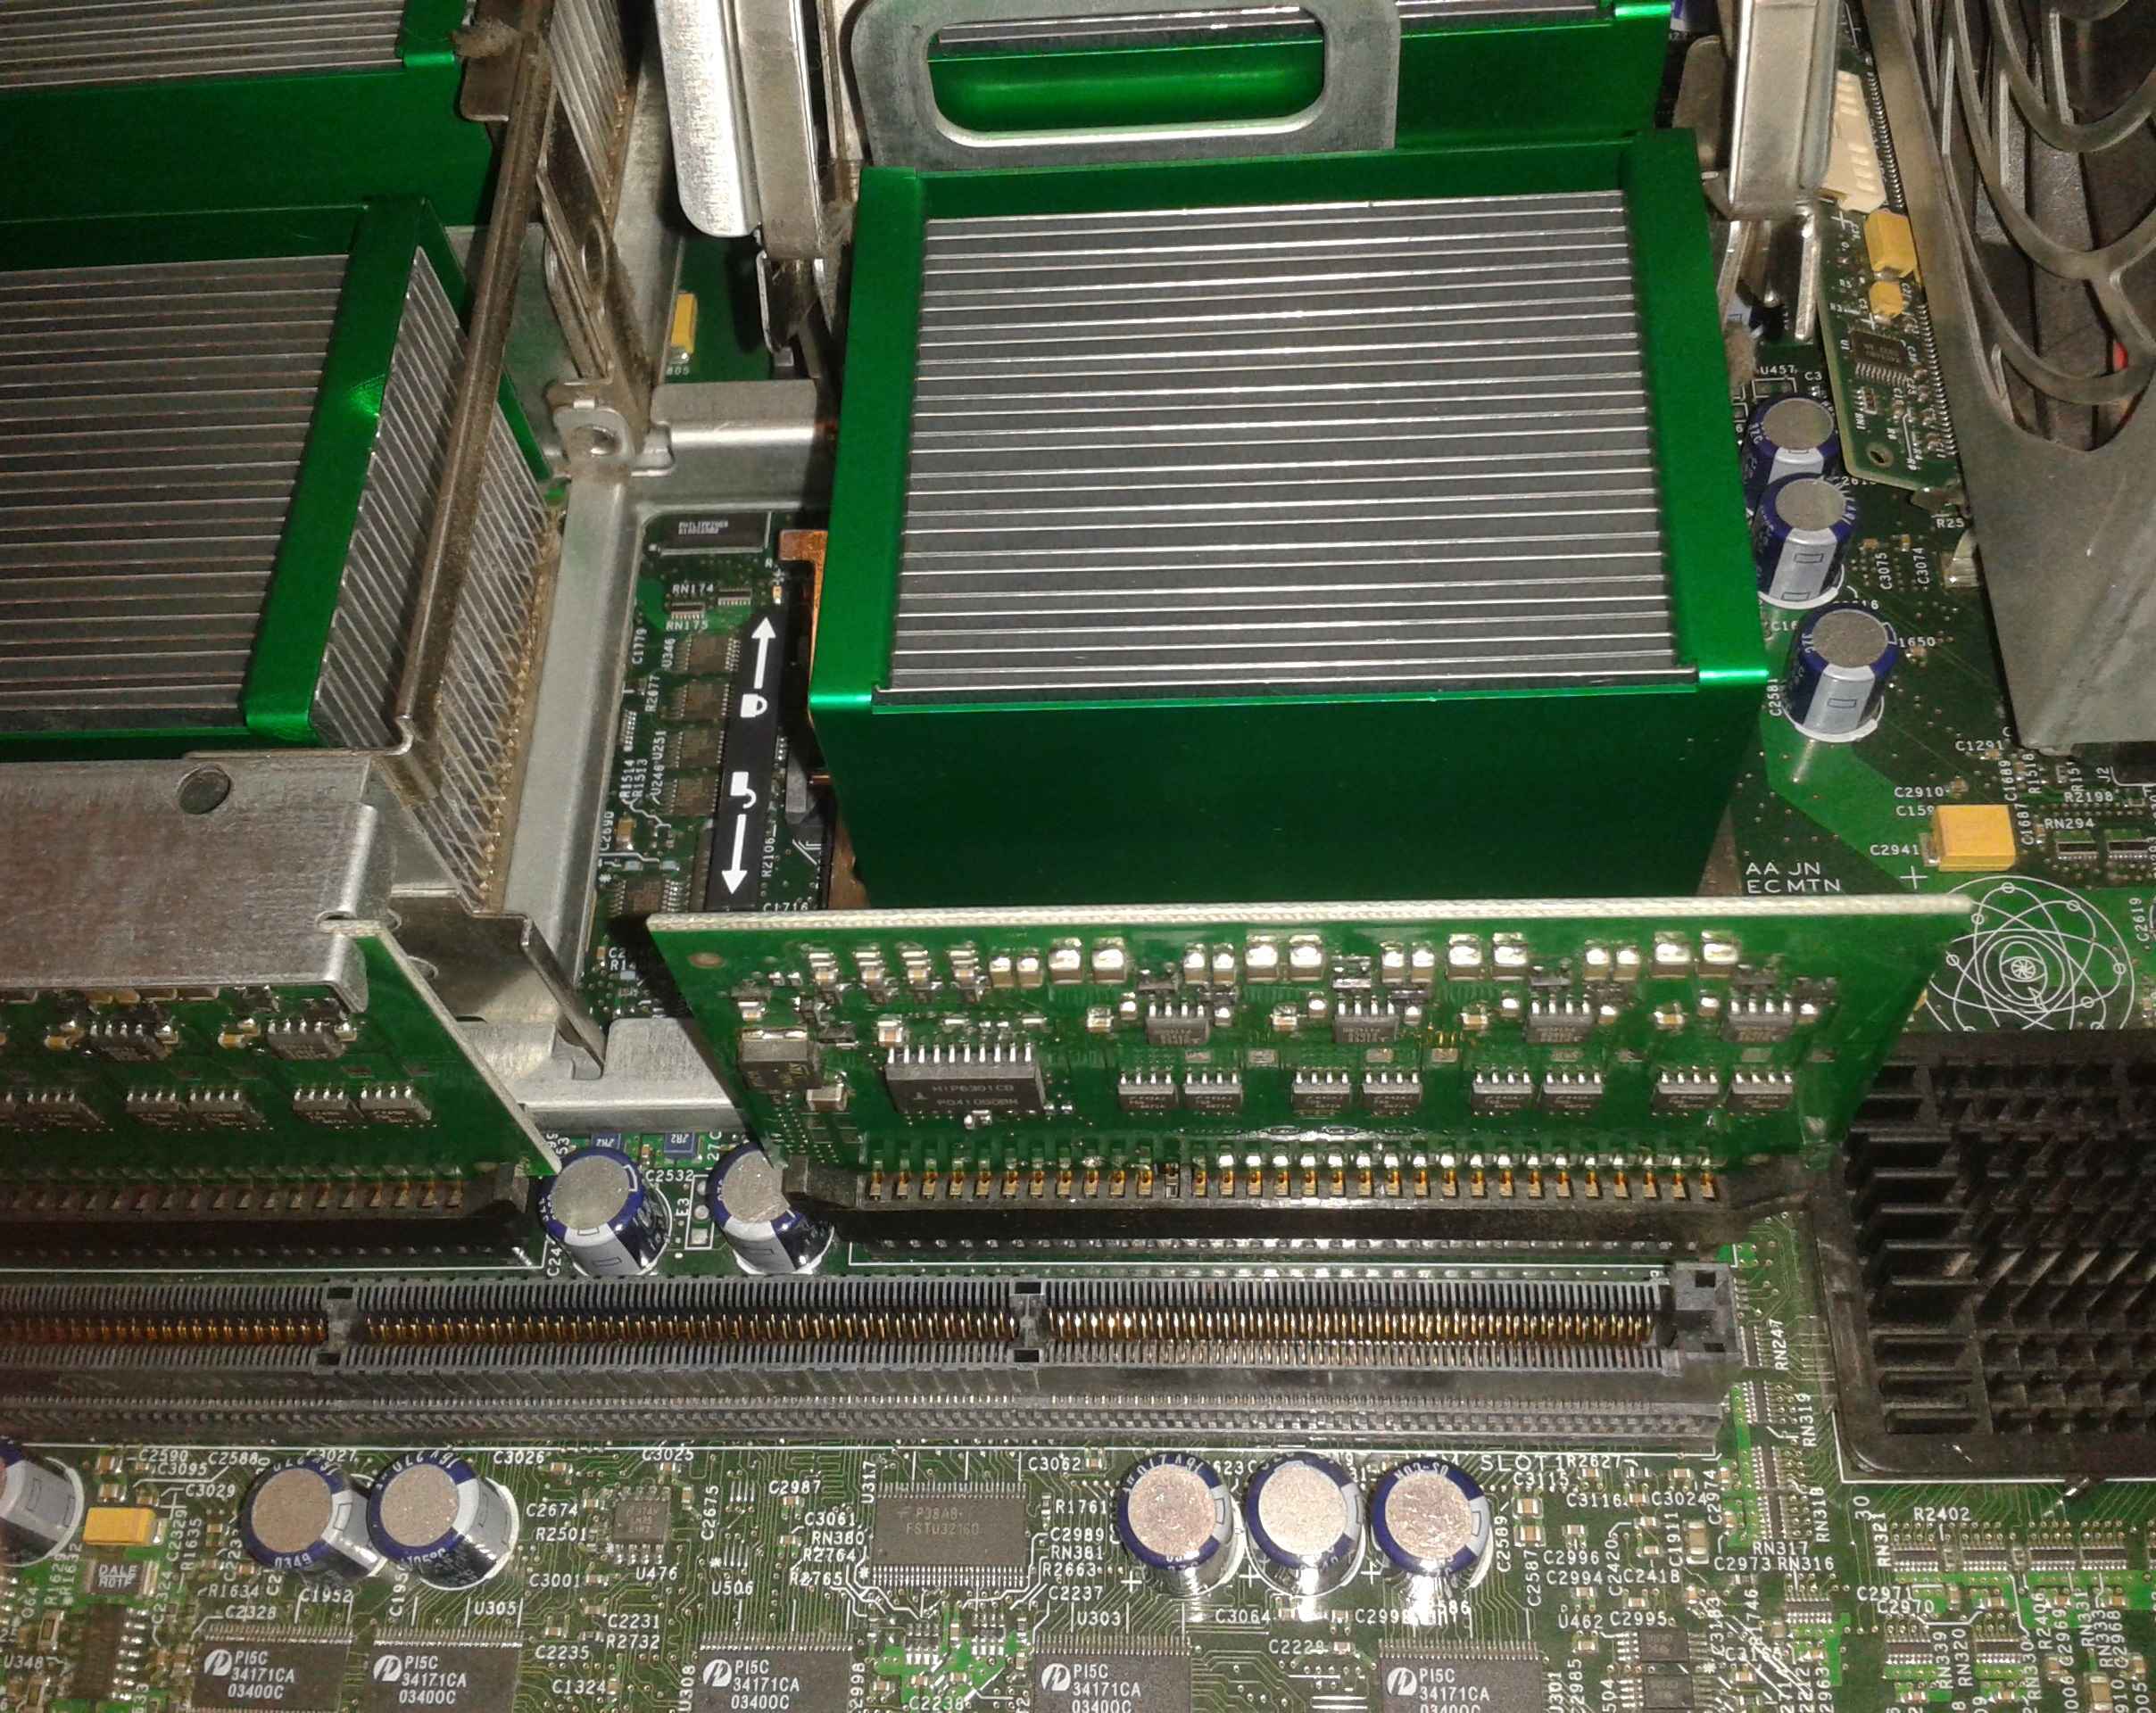
After removing the memory boards and the
air baffle, you can reach the processors. The motherboard has
four CPU sockets (Socket 603) for "Foster" and "Gallatin" codenamed Xeons. Note
that each socket
is numbered: the CPUs must be installed sequentially. To open the retaining
brackets of the heatsinks, the
blue screws need to be twisted. Then you can remove the processor voltage
regulator module,
and for the CPU, the locking lever needs to be at unlocked position. Officially
the heatsink and the CPU
should not be separated and must be bought together for replacement/upgrade.
In practice you can separate the two with a little skill and luck. The CPU is
inside a plastic frame
which fixes it in position on the heatsink. The frame can be carefully bent and
then the CPU can be
separated from the heatsink. Of course by doing this, the heat dissipation won't
be the
same after, so make sure to apply some heat paste before replacing the CPU in
the heatsink.
My server has four 2700Mhz 512K L2, 2MB L3, 400Mhz FSB Xeon CPUs (SL79Z)
installed.
Redundant hot-swap power supplies
A serious server
equipment cannot lack power supply redundancy. The DL580 G2 has two
800W low line/high line auto sensing PSUs (low voltage - USA standard, high
voltage - EU standard).
They can be accessed from the front of the server by unlocking the pulling
handle with the little red
lock. The PSUs themselves consume 20-30W power each (my guess it is due to the
efficiency loss and
having to keep the capacitors charged) but they do their job really well. My
server is
interesting here: one of its power supplies is 870W (ESP114A instead of ESP114
series) which is
originally used in HP Proliant DL585 G1 servers but seems to be fully compatible
with DL580 G2 as well.
So right now their performance is asymmetric (800W/870W) which shouldn't be a
problem
unless the server runs on full power (with my setup this is impossible to reach).

Like the power supplies,
the HDDs can be accessed from the front as well.
The server supports four 3.5" 80-pin parallel SCSI hot-swap HDDs in tray. In
practice,
this limits the internal storage to 1.2TB since no larger capacity SCSI HDD than
300GB was ever made, before the transition to SAS (Serial attached SCSI). The
disks connect to an SCSI backplane which has two 68-pin connectors for attaching
a PCI-X SCSI Raid card with cables. If the card is not present, the motherboard
integrated Smart Array 5i U160 SCSI controller works. To use external SCSI
storage,
an addon card with external SCSI connector is required.
The Smart Array series raid controllers are able to detect HDD failures which
is then indicated on the HDD hot-swap tray with a red error light.

After kicking in the
power, it takes a while for the screen to appear. During that time,
the server checks for critical hardware and spins up the fans to maximum RPM (producing
loud noise).
If everything is OK, a Proliant logo appears and the fans lower their RPM to
normal levels.
During POST, CPU, RAM and expansion cards are tested, and you can enter system
BIOS by
pressing F9. Most of the cards have bios as well, with their respective keypress
combinations.
The system bios contains a backup version, so you can restore that if (for any
reason) the primary
BIOS fails to load. A wide variety of settings are available, including
selecting boot device,
CPU settings, memory settings (Advanced ECC, mirrored memory etc...), and many
other
miscellaneous things.

The
Proliant DL580 G2 is an excellent server which served for long years before
retirement.
Good serviceability, scalability and performance. The server itself and used
components/expansion cards
can be bought cheap on auction sites which makes it a good system admin
practicing machine.
One drawback is that it does not have any power regulation measures which makes
it expensive to run
(mine consumes 280W idle). The other problem is that the CPUs do not have 64 bit
and modern
operating systems tend to drop support for 32 bit versions. It also lacks BIOS
support for booting
from USB, which can make life hard without CD-ROM and Floppy drive. My server
originally
didn't have CD-ROM, so I was forced to use PXE install. I was looking for
workarounds and
found Plop Boot Manager which can be written to floppy and supports booting from
pendrive
(sadly cannot boot from USB optical drives though).